Last article, we looked at the essential hardware and software you need to get started in computer music production. This week, we’re going to look at actually creating music with your computer set up.
There are two ways to make music with a computer set up. These are, recording real instruments with microphones or going virtual with instrument plugins and MIDI. While there are some producers who stick solely to one method, most of us find a comfortable balance between the two. Let’s have a look at both methods and see how they can benefit you, as an aspiring producer.
Contributed by David Jiang for the Roland Australia Blog
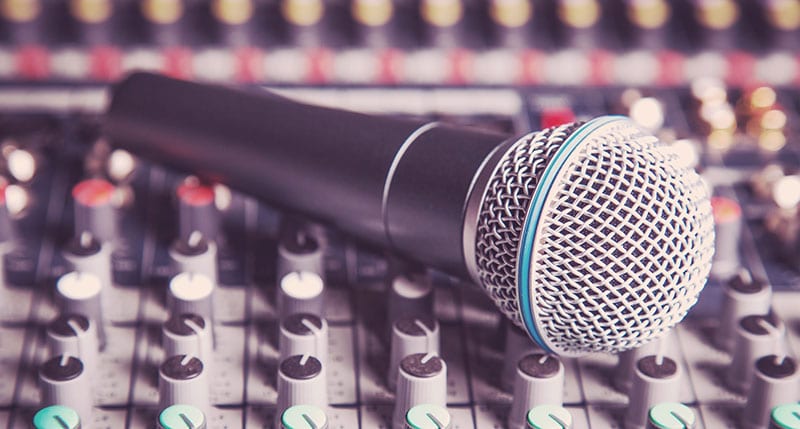
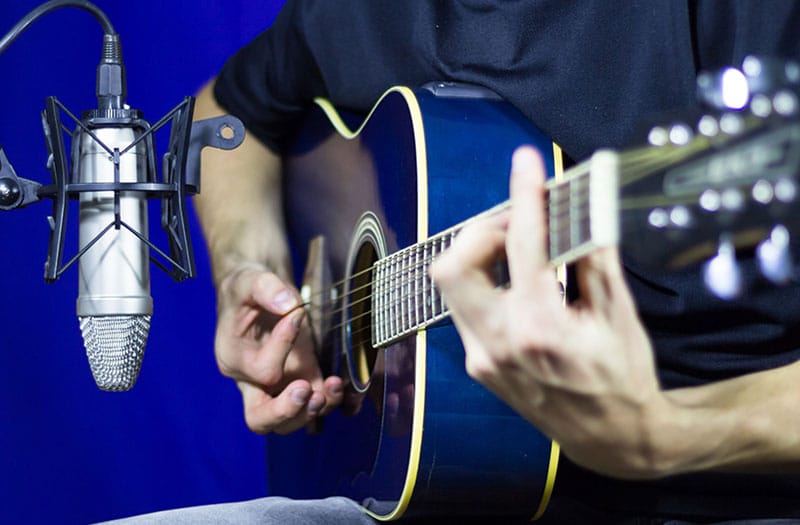 Something special happens when you capture a live performance. You are not only recording the artist’s performance. You are also capturing a moment in time and how the music actually sounds in the room. At the most basic level, recording live instruments is as simple as choosing a microphone and placing it in front of the sound source. However, there is a lot more to it than just that. Here are a few things that you need to consider when recording with microphones.
 Dynamic microphones like the Shure SM-58 or the AKG D-112 have a diaphragm with a coil attached that moves between a magnet. These mics are very hardy and can take a lot of abuse. Close drum hits and guitar amplifiers benefit from using dynamic mics. The drawback of dynamic microphones is that they are generally not as sensitive as other types of microphones and do not react as quickly to sharp changes in volume, known as transients.
 Condenser microphones like the Rode NT-1 and Neumann U87 have a thin conductive diaphragm which is set against a charged back plate. These microphones require a power source in order to function. Transistor condensers use phantom power from your interface or mixer whereas tube condensers have their own dedicated power supplies. The diaphragm on a condenser is more fragile than those found in dynamic microphones and therefore you should take more care when placing these microphones in front of high volume sound sources.
A big benefit of using condensers is that they are more sensitive and react to transients faster, due to their lighter diaphragm, . Therefore, condensers offer a clearer, more accurate reproduction of the sound that you are capturing. Most instruments benefit from using a condenser and they are often a workhorse microphone in a studio situation.
Condenser microphones like the Rode NT-1 and Neumann U87 have a thin conductive diaphragm which is set against a charged back plate. These microphones require a power source in order to function. Transistor condensers use phantom power from your interface or mixer whereas tube condensers have their own dedicated power supplies. The diaphragm on a condenser is more fragile than those found in dynamic microphones and therefore you should take more care when placing these microphones in front of high volume sound sources.
A big benefit of using condensers is that they are more sensitive and react to transients faster, due to their lighter diaphragm, . Therefore, condensers offer a clearer, more accurate reproduction of the sound that you are capturing. Most instruments benefit from using a condenser and they are often a workhorse microphone in a studio situation.
 Ribbon microphones like the Royer R121 have a thin conductive ribbon diaphragm placed in between two poles of a magnet. The ribbon is very delicate and you should take extreme care when placing these close to high volume sound sources, especially things like drums that have quick transients. Unless specifically stated by the manufacturer, ribbon microphones should not be phantom powered as it will overload the ribbon and break it.
Ribbons have many of the benefits of condenser microphones but give a very different character of sound, often described as dark. Bright, edgy instruments like horns benefit from a close ribbon microphone. Another common usage is to place a ribbon some distance away, paired with a close dynamic or condenser. This gives you a balanced near-far signal, which is especially useful with guitar cabinets.
Aside from the microphone type, another determining factor of what microphone to choose is the polar pattern. A microphone polar pattern is how sensitive a microphone is to a sound coming from a specific angle. These are the four main types of polar patterns you will come across. (Definitions taken from the A-Z of Recording, a great resource for those of you just starting out).
Cardioid: A polar pattern that resembles a heart shape. Cardioid MICROPHONES are most sensitive at the front and progressively become less sensitive as you go around the sides of the microphone, until it completely rejects sounds coming from the rear of the microphone.
Hyper Cardioid: A polar pattern that is similar to a cardioid pattern, but trades less sensitivity from the sides of the MICROPHONE. It has a slightly increased sensitivity to sound coming from the rear of the microphone at short distances. Place hyper cardioid microphones at a 120 degree angle from any sound sources you would like to reject.
Bi-directional: A polar pattern, also known as a figure 8. Bi-directional MICROPHONES are most sensitive at the front and rear of the microphone and completely reject sound sources from the side.
Omni-directional: A polar pattern that is equally sensitive to sound sources from all angles. These MICROPHONES are excellent for capturing room sounds.
Most dynamic microphones are either cardioid or hyper cardioid and almost every ribbon microphone is bi-directional. Condensers will either be stuck in one of the patterns, or have a switch or knob that allows them to change between different ones.
Generally, omni-directional polar patterns are most useful for recording room ambience. More directional patterns work in spot mic positions, but don’t let this rule you. Give all different patterns a go and see what works best for you.
Mono or Stereo?
Another consideration when miking up an instrument is whether to record in mono or stereo. Recording in stereo means you either need a matched pair of microphones or a specialized stereo microphone. If you really want to give your recording a sense of depth and space though, you should definitely give it a go.
The easiest stereo recording configuration is the A-B, or spaced set up. To record in A/B stereo, get two microphones (either cardioid or omni-directional) and face them parallel to each other towards the sound source. The microphones should be equal in height at a distance of 1-3 meters (3-10 feet) apart. A few other stereo microphone setups (X/Y, ORTF, Mid-Side, NOS) give different stereo fields and may work better for you in your chosen application. If you are interested in learning more about these set ups, a quick Google search will show you how to use them and the benefits of each.
Recording Spaces
Have you ever tried singing in the shower? There’s usually an excellent ambient reverb in there, due to all of the hard flat surfaces. Now imagine putting a guitar amplifier in the same shower and miking it up. That same reverb will be all through your recording, most likely muddying everything up.
Every room has its own acoustic signature and any microphone you put in a room will pick up that signature. Depending on the room, this could be very desirable or it could be a mess of reflections that ruin your recording. We’d all love to have a studio quality room to record in, but often times that just isn’t feasible. Therefore, we have two options to make the best of our recording space.
Ribbon microphones like the Royer R121 have a thin conductive ribbon diaphragm placed in between two poles of a magnet. The ribbon is very delicate and you should take extreme care when placing these close to high volume sound sources, especially things like drums that have quick transients. Unless specifically stated by the manufacturer, ribbon microphones should not be phantom powered as it will overload the ribbon and break it.
Ribbons have many of the benefits of condenser microphones but give a very different character of sound, often described as dark. Bright, edgy instruments like horns benefit from a close ribbon microphone. Another common usage is to place a ribbon some distance away, paired with a close dynamic or condenser. This gives you a balanced near-far signal, which is especially useful with guitar cabinets.
Aside from the microphone type, another determining factor of what microphone to choose is the polar pattern. A microphone polar pattern is how sensitive a microphone is to a sound coming from a specific angle. These are the four main types of polar patterns you will come across. (Definitions taken from the A-Z of Recording, a great resource for those of you just starting out).
Cardioid: A polar pattern that resembles a heart shape. Cardioid MICROPHONES are most sensitive at the front and progressively become less sensitive as you go around the sides of the microphone, until it completely rejects sounds coming from the rear of the microphone.
Hyper Cardioid: A polar pattern that is similar to a cardioid pattern, but trades less sensitivity from the sides of the MICROPHONE. It has a slightly increased sensitivity to sound coming from the rear of the microphone at short distances. Place hyper cardioid microphones at a 120 degree angle from any sound sources you would like to reject.
Bi-directional: A polar pattern, also known as a figure 8. Bi-directional MICROPHONES are most sensitive at the front and rear of the microphone and completely reject sound sources from the side.
Omni-directional: A polar pattern that is equally sensitive to sound sources from all angles. These MICROPHONES are excellent for capturing room sounds.
Most dynamic microphones are either cardioid or hyper cardioid and almost every ribbon microphone is bi-directional. Condensers will either be stuck in one of the patterns, or have a switch or knob that allows them to change between different ones.
Generally, omni-directional polar patterns are most useful for recording room ambience. More directional patterns work in spot mic positions, but don’t let this rule you. Give all different patterns a go and see what works best for you.
Mono or Stereo?
Another consideration when miking up an instrument is whether to record in mono or stereo. Recording in stereo means you either need a matched pair of microphones or a specialized stereo microphone. If you really want to give your recording a sense of depth and space though, you should definitely give it a go.
The easiest stereo recording configuration is the A-B, or spaced set up. To record in A/B stereo, get two microphones (either cardioid or omni-directional) and face them parallel to each other towards the sound source. The microphones should be equal in height at a distance of 1-3 meters (3-10 feet) apart. A few other stereo microphone setups (X/Y, ORTF, Mid-Side, NOS) give different stereo fields and may work better for you in your chosen application. If you are interested in learning more about these set ups, a quick Google search will show you how to use them and the benefits of each.
Recording Spaces
Have you ever tried singing in the shower? There’s usually an excellent ambient reverb in there, due to all of the hard flat surfaces. Now imagine putting a guitar amplifier in the same shower and miking it up. That same reverb will be all through your recording, most likely muddying everything up.
Every room has its own acoustic signature and any microphone you put in a room will pick up that signature. Depending on the room, this could be very desirable or it could be a mess of reflections that ruin your recording. We’d all love to have a studio quality room to record in, but often times that just isn’t feasible. Therefore, we have two options to make the best of our recording space.
 A big bonus to using virtual instruments is that you get high quality sounds that might be hard to capture in a home studio due to poor acoustics. There are also a great many exciting synth instruments available, such as the AIRA Plug-Out series that cost much less than buying a full selection of instruments.
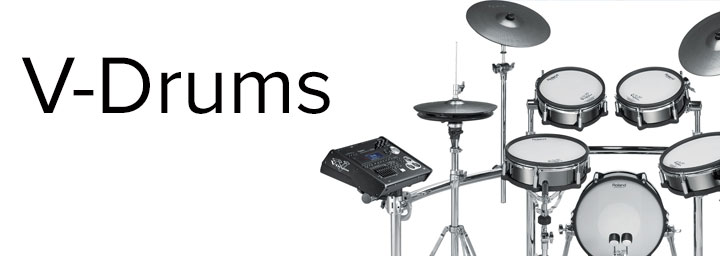
If you do want to make use of virtual instruments, you’ll need a decent MIDI controller. While most MIDI controllers come in the form of keyboards or pad controllers, drummers can get in on the action with all models of V-Drums. Guitarists can too, with the Guitar to MIDI functions on the GR-55 guitar synth or GT-100, GT-1 and GT-001 multi effects units. Woodwind players are also able to control virtual instruments with the USB to MIDI output on an AE-10 Aerophone.
A big bonus to using virtual instruments is that because you are using MIDI, you can adjust your performance after you have recorded it. You can do things like changing the tempo, changing notes or cutting and pasting verse/choruses.
Most DAWs come with a selection of virtual instruments to play with, but if you want to expand your library, there are quite a few free instruments available online. Just make sure you are getting the right plugin format for your DAW.
Another big bonus of using MIDI to record is that you can import your MIDI files into scoring software such as Finale or Sibelius and create sheet music of your performances. This means that if you did ever want to switch from virtual instruments to the real thing, your session musicians won’t have to play by ear.
So there you have it, two different methods for getting your ideas down. Join us next time, when we’ll talk about mixing your recordings using your DAW.
A big bonus to using virtual instruments is that you get high quality sounds that might be hard to capture in a home studio due to poor acoustics. There are also a great many exciting synth instruments available, such as the AIRA Plug-Out series that cost much less than buying a full selection of instruments.
If you do want to make use of virtual instruments, you’ll need a decent MIDI controller. While most MIDI controllers come in the form of keyboards or pad controllers, drummers can get in on the action with all models of V-Drums. Guitarists can too, with the Guitar to MIDI functions on the GR-55 guitar synth or GT-100, GT-1 and GT-001 multi effects units. Woodwind players are also able to control virtual instruments with the USB to MIDI output on an AE-10 Aerophone.
A big bonus to using virtual instruments is that because you are using MIDI, you can adjust your performance after you have recorded it. You can do things like changing the tempo, changing notes or cutting and pasting verse/choruses.
Most DAWs come with a selection of virtual instruments to play with, but if you want to expand your library, there are quite a few free instruments available online. Just make sure you are getting the right plugin format for your DAW.
Another big bonus of using MIDI to record is that you can import your MIDI files into scoring software such as Finale or Sibelius and create sheet music of your performances. This means that if you did ever want to switch from virtual instruments to the real thing, your session musicians won’t have to play by ear.
So there you have it, two different methods for getting your ideas down. Join us next time, when we’ll talk about mixing your recordings using your DAW.


Recording acoustic instruments:
Something special happens when you capture a live performance. You are not only recording the artist’s performance. You are also capturing a moment in time and how the music actually sounds in the room. At the most basic level, recording live instruments is as simple as choosing a microphone and placing it in front of the sound source. However, there is a lot more to it than just that. Here are a few things that you need to consider when recording with microphones.
- What type of microphone are you going to use? Dynamic, condenser or ribbon? What polar pattern will you use to record?
- Are you going to record in mono or stereo?
- What room are you recording in? Some rooms are excellent for recording in. Other rooms give you a muddy, unusable mess.
Dynamic microphones like the Shure SM-58 or the AKG D-112 have a diaphragm with a coil attached that moves between a magnet. These mics are very hardy and can take a lot of abuse. Close drum hits and guitar amplifiers benefit from using dynamic mics. The drawback of dynamic microphones is that they are generally not as sensitive as other types of microphones and do not react as quickly to sharp changes in volume, known as transients.
Condenser microphones like the Rode NT-1 and Neumann U87 have a thin conductive diaphragm which is set against a charged back plate. These microphones require a power source in order to function. Transistor condensers use phantom power from your interface or mixer whereas tube condensers have their own dedicated power supplies. The diaphragm on a condenser is more fragile than those found in dynamic microphones and therefore you should take more care when placing these microphones in front of high volume sound sources.
A big benefit of using condensers is that they are more sensitive and react to transients faster, due to their lighter diaphragm, . Therefore, condensers offer a clearer, more accurate reproduction of the sound that you are capturing. Most instruments benefit from using a condenser and they are often a workhorse microphone in a studio situation.
Ribbon microphones like the Royer R121 have a thin conductive ribbon diaphragm placed in between two poles of a magnet. The ribbon is very delicate and you should take extreme care when placing these close to high volume sound sources, especially things like drums that have quick transients. Unless specifically stated by the manufacturer, ribbon microphones should not be phantom powered as it will overload the ribbon and break it.
Ribbons have many of the benefits of condenser microphones but give a very different character of sound, often described as dark. Bright, edgy instruments like horns benefit from a close ribbon microphone. Another common usage is to place a ribbon some distance away, paired with a close dynamic or condenser. This gives you a balanced near-far signal, which is especially useful with guitar cabinets.
Aside from the microphone type, another determining factor of what microphone to choose is the polar pattern. A microphone polar pattern is how sensitive a microphone is to a sound coming from a specific angle. These are the four main types of polar patterns you will come across. (Definitions taken from the A-Z of Recording, a great resource for those of you just starting out).
Cardioid: A polar pattern that resembles a heart shape. Cardioid MICROPHONES are most sensitive at the front and progressively become less sensitive as you go around the sides of the microphone, until it completely rejects sounds coming from the rear of the microphone.
Hyper Cardioid: A polar pattern that is similar to a cardioid pattern, but trades less sensitivity from the sides of the MICROPHONE. It has a slightly increased sensitivity to sound coming from the rear of the microphone at short distances. Place hyper cardioid microphones at a 120 degree angle from any sound sources you would like to reject.
Bi-directional: A polar pattern, also known as a figure 8. Bi-directional MICROPHONES are most sensitive at the front and rear of the microphone and completely reject sound sources from the side.
Omni-directional: A polar pattern that is equally sensitive to sound sources from all angles. These MICROPHONES are excellent for capturing room sounds.
Most dynamic microphones are either cardioid or hyper cardioid and almost every ribbon microphone is bi-directional. Condensers will either be stuck in one of the patterns, or have a switch or knob that allows them to change between different ones.
Generally, omni-directional polar patterns are most useful for recording room ambience. More directional patterns work in spot mic positions, but don’t let this rule you. Give all different patterns a go and see what works best for you.
Mono or Stereo?
Another consideration when miking up an instrument is whether to record in mono or stereo. Recording in stereo means you either need a matched pair of microphones or a specialized stereo microphone. If you really want to give your recording a sense of depth and space though, you should definitely give it a go.
The easiest stereo recording configuration is the A-B, or spaced set up. To record in A/B stereo, get two microphones (either cardioid or omni-directional) and face them parallel to each other towards the sound source. The microphones should be equal in height at a distance of 1-3 meters (3-10 feet) apart. A few other stereo microphone setups (X/Y, ORTF, Mid-Side, NOS) give different stereo fields and may work better for you in your chosen application. If you are interested in learning more about these set ups, a quick Google search will show you how to use them and the benefits of each.
Recording Spaces
Have you ever tried singing in the shower? There’s usually an excellent ambient reverb in there, due to all of the hard flat surfaces. Now imagine putting a guitar amplifier in the same shower and miking it up. That same reverb will be all through your recording, most likely muddying everything up.
Every room has its own acoustic signature and any microphone you put in a room will pick up that signature. Depending on the room, this could be very desirable or it could be a mess of reflections that ruin your recording. We’d all love to have a studio quality room to record in, but often times that just isn’t feasible. Therefore, we have two options to make the best of our recording space.
- Acoustically treat the room as much as you can and then find the most pleasing space in your recording room and record there.
- Try to deaden everything as much as possible and add reverb later with hardware or plugins.
Using Virtual Instruments and MIDI:
A big bonus to using virtual instruments is that you get high quality sounds that might be hard to capture in a home studio due to poor acoustics. There are also a great many exciting synth instruments available, such as the AIRA Plug-Out series that cost much less than buying a full selection of instruments.
If you do want to make use of virtual instruments, you’ll need a decent MIDI controller. While most MIDI controllers come in the form of keyboards or pad controllers, drummers can get in on the action with all models of V-Drums. Guitarists can too, with the Guitar to MIDI functions on the GR-55 guitar synth or GT-100, GT-1 and GT-001 multi effects units. Woodwind players are also able to control virtual instruments with the USB to MIDI output on an AE-10 Aerophone.
A big bonus to using virtual instruments is that because you are using MIDI, you can adjust your performance after you have recorded it. You can do things like changing the tempo, changing notes or cutting and pasting verse/choruses.
Most DAWs come with a selection of virtual instruments to play with, but if you want to expand your library, there are quite a few free instruments available online. Just make sure you are getting the right plugin format for your DAW.
Another big bonus of using MIDI to record is that you can import your MIDI files into scoring software such as Finale or Sibelius and create sheet music of your performances. This means that if you did ever want to switch from virtual instruments to the real thing, your session musicians won’t have to play by ear.
So there you have it, two different methods for getting your ideas down. Join us next time, when we’ll talk about mixing your recordings using your DAW.
Related Articles
THE A-Z OF RECORDING 10 WAYS GUARANTEED TO QUICKLY IMPROVE YOUR MUSIC PRODUCTION COMPUTER MUSIC PRODUCTION FOR BEGINNERS PART 1: THE ESSENTIALSRelated Products