It’s a common scenario — you mix your song, you think it sounds great, then you play your CD or MP3 alongside a commercial record and suddenly yours doesn’t sound so big anymore. Why is that? The short answer is that you are comparing your mix with one that has been through an extra stage known as mastering. The much longer answer is to describe what mastering actually means. [Photo: John Hult].
Contributed by Roland UK
What is mastering?
A top commercial mastering house has the best monitors, lots of expensive boutique processors — often bristling with glowing valves —superb acoustics and an engineer with a lot of experience. In the days of vinyl, the mastering engineer simply had to process the audio to make it translate to vinyl in such a way that the stylus could track it without hopping out of the groove. In the digital world, mastering is more about adding polish and weight to a mix to make it more commercially attractive.
Along the way, they’ll use their experience and high-end kit to try to correct any problems that occurred during the mix, many of which come down to inaccurate monitoring in the original studio, where some finely-tuned EQ may be needed to redress the problem. If working on an album, he or she will also ensure that the tracks have a common tonal balance and that the relative levels of the songs feel natural. In the world of individual song downloads though, this last point may not be quite so critical as it once was.
Many mixing problems could be avoided if the original mix was double checked on quality headphones to ensure that it sounded properly balanced, particularly at the bass end where domestic studios and small monitor speakers are usually the least accurate. There’s still no substitute for a first class monitoring room, but good headphones can be very revealing as can taking a copy of the mix out to your car or into a different room. Some people use multiple sets of monitor speakers to try to give them an overall picture but this doesn’t always work to plan, as any acoustic defects in the room affect all the speakers used in that room.
Adding That Final Polish
Once any tonal balance and level problems have been addressed, the mastering engineer adds that all important sense of weight and polish. No wonder then that your home mixes don’t seem to compare so well with a good commercial recording! In an ideal world where budgets permit, you’d take your finished mix to a professional mastering engineer, but as long as you are in a position to check your music on a number of different speaker systems and also on good headphones, you can get most of the way there yourself, using either old-school hardware or software plug-ins.
While you can buy ‘instant gratification’ plug-ins that handle mastering by giving you a range of presets to choose from, these are usually less than ideal as the creator of the presets has no idea what your mix is actually like or what problems it might suffer from! It’s far better to understand the process first and then to craft your mix as it deserves. But before we get onto the ‘hows’, it’s time for a word of warning about the ‘make it really loud’ request I hear so often.
Creating a really loud mix may not actually do you any favours as a lot of broadcasters and download companies are now using something called loudness normalisation to adjust the playback level of tracks to make them sound as consistent in level as possible. This process analyses the tracks in much the same way as the human hearing system works — it doesn’t just look at peak or RMS (Root Mean Square) levels.
What this means in practical terms is that if you’ve really ‘smashed’ your mix to make it sound ultra-loud, the playback system will simply turn it down and in all probability, your mix will then sound less powerful than the ones that were handled with a little more restraint, as the ‘make it loud’ process when taken to extremes, strips all the dynamics out of the music.
Home Mastering Basics
If your mixes are sounding pretty good already, then there are some fairly standard treatments that you can apply to make a mix sound louder and more dense without squashing the life out of it. Other than a good equaliser, which you may need to sort out tonal imbalances, the main tools are simply a compressor and a limiter.
The limiter always comes at the end of the processing chain and its job is to make sure that the audio is never allowed to clip. In fact, if you’re planning on releasing your music as MP3s, it is a good idea to set the limiter to prevent anything exceeding -2dB (Digital Full Scale or DFS), as the MP3 conversion process can sometimes add a dB or two of level. If your audio file is allowed to peak at 0dB DFS, then clipping could occur when you convert to MP3. I’ll come back to the other limiter settings in a moment.
Before the limiter comes your compressor and the job of a compressor is to reduce the level of sounds exceeding a certain threshold level. In other words, it automatically turns down the ‘too loud’ bits. When mixing a song, compression is often used on individual tracks where you’d normally set the threshold to allow the signal to reach a moderately high level before the compressor steps in to control it. At the mastering stage, we set the compressor rather differently.
As the character of a complete mix is likely to change more than that of say, a single track such as a vocal part, a compressor with an Auto Release setting is ideal as this can adapt to the way the dynamics of the song change. If there is no Auto Release option, then set a 200 to 400mS release time. The attack time should be set fairly fast but not so fast as to kill transient detail. A setting of maybe 20 to 50mS will suit most material.
If on the other hand your compressor also has an Auto Attack setting then try that but always rely on your ears, not on what the dials tell you. Unless producing dance music where you want to hear the compressor pumping, the real secret to mastering compression is to use a very low compression ratio, typically around 1.2:1, and then to adjust the threshold while watching the compressor’s gain reduction meter so that you get a maximum gain reduction of between 6dB and 12dB depending on the type of music. This usually means setting quite a low threshold. Rock, Indie and dance music can usually stand more compression than singer/songwriter music but use your ears to decide what works.
“Using a low ratio, low threshold compressor setting squashes most of the dynamic range of the mix very gently rather than just squashing the highest peaks by a lot.”
Using a low ratio, low threshold compressor setting squashes most of the dynamic range of the mix very gently rather than just squashing the highest peaks by a lot. In other words, lower level sounds are made to sound a little louder than before and high level sounds are pulled down, but in a fairly subtle way. Use the compressor’s make-up gain (sometimes called output gain) to bring the peak signal level back to where it was before and you’ll find your mix sounds a fair bit louder.
The Limiting Factor
Now comes our limiter, the job of which is to pull down the level of the very highest peaks by just a few dBs, typically 2dB to 6dB, again depending on the type of music. Limiters act very quickly, so nothing should ever exceed the output level you set using the limiter’s threshold control. As mentioned earlier, if you’re planning on making MP3s, set the limiter threshold to around -2dB.
Simply increase the input gain on the limiter until the gain reduction meter shows activity only on the highest peaks, such as loud snare hits and that’s it. As with compression, for every dB of limiting applied, you claw back one dB in level increase so using the combined compressor and limiter approach as described, your mix should sound much louder and more dense than it did before processing.
Using EQ to fix your mix
If your mix was good in the first place then you shouldn’t need much EQ. But if the mix lacks life, try a couple of dBs of 7kHz shelving boost to add ‘air’. If the mids sound boxy apply a couple of dBs of cut at around 200 to 250Hz. A spectrum analyser plug-in can be useful as it will show you if you have any obvious bumps or dips in the response, which for a typical pop mix, should drop away below 30Hz with a maximum at around 100Hz, falling away smoothly towards the top of the audio spectrum. Excessive sub bass (low frequency signals that flap your speakers and use up headroom but aren’t audible) can be tamed using an 18dB/octave high-pass filter set to around 30Hz.
Advanced Mastering Tricks
Some types of music can sound more powerful when a little distortion is added, but this has to be subtle enough not to sound like obvious distortion. Some people call this ‘warmth’. Devices or plug-ins that emulate valve circuitry or analogue tape can often add weight or warmth to a mix, but there’s another type of processing that can yield powerful results — parallel processing.
If using parallel processing, you’d still do the low ratio compression and limiting thing as before, but in addition you need to set up an aux send from the track. This is the same process you’d use if you were going to feed a global reverb or delay, but instead you insert a device or plug-in to add distortion and/or heavy compression. I’ll explain parallel compression first as it is a very common yet effective way of making tracks sound bigger without killing the transient detail.
Using parallel compression for a BIG sound
The trick is to set the compressor you’ve fed from your aux send to a high ratio (maybe 6:1 or higher) and then reduce the threshold until the gain reduction meter is showing something like 20dB. Use a fast attack time and a fast release time so that when you listen to the compressor output, it sounds extremely squashed and quite probably unpleasant. If you can hear the gain pumping up and down with the kick drum beats, try to adjust the release time so that the pumping effect reinforces the beat of the song.
Now comes the crucial part, which is to mix in just a little of that over-compressed sound with the rest of your mastered signal — maybe 15dB or so below the main signal level. During loud events, such as drum hits, the added compression will be fairly insignificant but where the levels fall, the hyper-squashed signal will reinforce the quieter parts, such as reverb decays, the sustain of drums and so on.
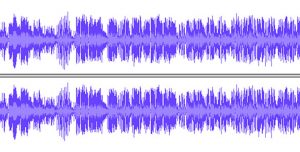
If you view your audio waveform as a mountain range, you’re using parallel compression to fill up the bottoms of the valleys in the original signal, rather than trimming off the peaks as you would using conventional in-line compression. The outcome is that you don’t lose any percussive detail, but everything gets a lot fatter sounding.
“When you think you’re done, listen to the results on as many different speaker systems as possible and compare your efforts with commercial records that are of a similar style.”
The same trick can be used with a distortion device as an alternative to a compressor — or maybe as well as a compressor. Again, don’t crank up the distortion to the point that it sounds fuzzy, but just to the point that it sounds warm and slightly unfocused. I tried a variation on this recently by using a guitar speaker emulation plug-in as a parallel processor, which you can either use on its own as a parallel process or after a parallel compressor. The frequency response of the guitar cab adds emphasis to the lower mids while the small resonances that all such cabinets exhibit has the effect of stretching short notes, which makes percussion sound more powerful, vocals more solid and guitar parts warmer. Again, just bring up the effects return slider gradually until you can hear the sound just start to fill out. Not going too far is the key to making parallel processing of any kind work effectively.
When you think you’re done, listen to the results on as many different speaker systems as possible and compare your efforts with commercial records that are of a similar style. Now the loudness difference should be much less obvious so the comparison will be much more realistic.
One final tip is to setup the ‘gentle compression plus limiting’ combination as a ‘pseudo mastering’ preset in your recording software and insert it on a temporary basis when comparing your mixes with commercial recordings. It will make it much easier to find problems in your mixes at an earlier stage, before you get down to any serious mastering.
Related Articles
COMPUTER MUSIC PRODUCTION FOR BEGINNERS PART 1: THE ESSENTIALS
COMPUTER MUSIC PRODUCTION FOR BEGINNERS PART 2: RECORDING AND COMPOSITION
10 WAYS GUARANTEED TO QUICKLY IMPROVE YOUR MUSIC PRODUCTION
10 MORE WAYS GUARANTEED TO QUICKLY IMPROVE YOUR MUSIC PRODUCTION
THE A-Z OF RECORDING