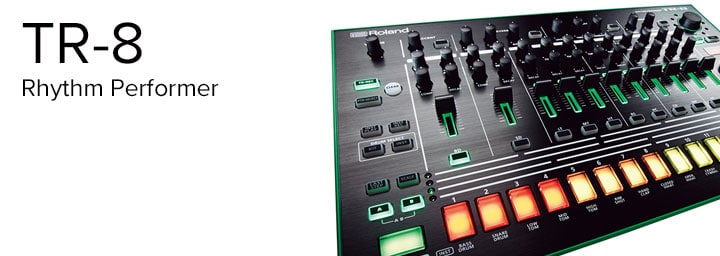
The AIRA TR-8 is the next step in the evolution of Roland’s TR drum machines. This Ultimate Guide has everything you need to know about the TR-8!
Unleashed upon an unsuspecting world in the 1980s, the TR-808 and TR-909 produce arguably the most influential drum sounds in modern music. Not only have they appeared on thousands of dance tracks over the course of three decades, they’ve helped to define the sound of entire musical genres. From rap and house to techno and trance, the TR-808 and TR-909 have left an indelible mark on the art and culture of music.
Contributed by Christian Moraga for the Roland Australia Blog
THE NEXT STEP IN THE TR- EVOLUTION IS THE AIRA TR-8
The TR-8 combines the best sounds and features of Roland’s legacy drum machines, while adding performance features and effects to take it into the next generation.
The TR-8 is an instrument that is designed to be played. All of the knobs, buttons, switches and sliders are there to get hands-on and perform so that you can create a beat never heard before! But if you have never played with a drum machine before, the array of blinking lights and instruments can be a little daunting. What’s a sequencer? What does shuffle do? How can I add a roll/fill?
That’s why we have composed THE ULTIMATE GUIDE TO THE AIRA TR-8 RHYTHM PERFORMER. These tips will answer all of your questions and help you to get straight into making a beat. But be warned! Once you make your first beat, we guarantee that you won’t be able to stop!
Each tip comes from the video below. This guide will go into more detail and provide a few “pro” tips too. Here’s a list of the tips. Make sure to check in regularly, as we will update this list with more tips soon.
THE LIST
1 – PROGRAMMING A PATTERN IN TR-REC MODE
2 – RECORDING A PATTERN IN INST REC MODE
3 – SELECT YOUR DRUM KIT – KIT SELECT
4 – MODIFY YOUR DRUM KIT AND INSTRUMENT
5 – PERFORMANCE MADE EASY WITH INST PLAY MODE
6 – ADD ROLLS AND FILLS IN INST PLAY MODE
7 – CHANGE THE FEEL WITH SHUFFLE & TEMPO
8 – ADD REVERB TO YOUR BEAT
9 – USE DELAY FOR SYNCOPATED EFFECTS
10 – KEEP REVERB AND DELAY SETTINGS LOCKED TO A PATTERN
11 – SIDECHAIN OTHER INSTRUMENTS WITH EXTERNAL IN
12 – CREATE SPACE IN YOUR DRUM MIX WITH PANNING
13 – MASTER THE SCATTER FUNCTION
14 – ADJUST INSTRUMENT GAINS
15 – COPY YOUR PATTERNS
16 – LOCK A PATTERN SO IT CAN’T BE CHANGED
17 – RANDOM PATTERN
18 – LEARN THE KIT COLOUR CODES FOR FAST ACCESS TO YOUR SOUNDS
19 – SELECT ALTERNATE SOUNDS [7X7 ONLY]
20 – SPECIFY FLAM AND SPACING [7X7 ONLY]
21 – ASSIGN SOUNDS TO DIFFERENT OUTPUTS
22 – RUN MONO INSTRUMENTS INTO THE EXTERNAL INPUT
23 – LOWER YOUR OUTPUT VOLUME FOR MORE HEADROOM
24 – MAKE THE MOST WITH MIDI
25 – GET THAT AUTHENTIC 808 AND 909 FEEL
26 – LOCK YOUR SCALE
27 – CHANGE THE LIGHTS
28 – SEQUENCE SAMPLES USING YOUR TR-8
TIP #1 – PROGRAMMING A PATTERN IN TR-REC MODE
Let’s start at the very beginning. To make your first drum beat, you will need to use the 16 buttons at the bottom of the AIRA TR-8. These 16 buttons are STEPS and are collectively known as a sequencer. This 16-step sequencer is the same one used in the classic Roland drum machines of the past and is a great visual way to record and edit (“program”) your drum beat.
If you have ever programmed beats in your DAW, the 16-step sequencer acts in the same way. The 16-step sequencer has become the traditional way to program drums, as it easily allows you to program four bars, each with four counts. The first count of each bar is marked as blue for reference.
To Begin
To program your first beat, you will need to select TR-REC mode, then select one of the INSTRUMENT buttons. Start with the BD (bass drum).
So let’s make a four-on-the-floor beat. Make sure the BD button under the slider is lit up. Then press buttons for the first count of each bar (Steps 1, 5, 9 and 13). They should light up as red now – this marks a programmed step. Hit the START/STOP button (make sure the BD slider and VOLUME are up) and you will hear a kick drum every four beats.
While still in TR-REC mode and with the beat playing, select SD (snare drum) and program Steps 5 and 13. You will now hear that classic four-on-the-floor rhythm. Congrats! You have made your first beat or “pattern”.
You have 16 patterns at your disposal, each selected via PTN SELECT. Each pattern has an “A” and “B” mode, allowing you to have two 16-step beats per pattern. This is a great way to add variations to your main pattern for performance.
To clear a pattern, hit PTN SELECT, hold CLEAR and select the PATTERN NUMBER. Press START/STOP and you shouldn’t hear any beat.

TIP #2 – RECORDING A PATTERN IN INST REC MODE
Sometimes when you have a specific rhythm in your head, you might want to “tap” out the pattern in real-time, instead of programming steps. INST REC mode allows you to record individual instruments by playing the specified 16-step button.
To record a closed hi-hat (CH) for example, find the 16-step that is marked with CLOSED HIHAT, press INST REC then START/STOP. When the green light scrolls to Step 1, tap in your closed hat rhythm and it will automatically record it as a pattern.
The great thing about INST REC mode is that it will auto-quantise your tapped beat. Quantisation is the process of moving off-time beats onto the closest beat. Programming couldn’t be easier.
You can also fine-tune your pattern by then going into TR-REC mode, selecting the CH INSTRUMENT button (under the volume slider) and add/remove more closed hat hits.

TIP #3 – SELECT YOUR DRUM KIT – KIT SELECT
The TR-8 has two main drum kits – the classic TR-808 and TR-909. Each drum kit has their own individual sound and response, and has been meticulously recreated by the engineers of the originals.
To access the 808 and 909 kits, go to the DRUM SELECT section and press KIT. The 16-step buttons will light up in blue, each one indicating a saved kit. Step 1 gives you access to the 808 kit, with Step 2 being the 909 kit. The other 14 kits are variations of the 808/909 instrument sounds and you can mix and match your own and save them.

TIP #4 – MODIFY YOUR DRUM KIT AND INSTRUMENT
Within each drum kit, you have a choice of selecting a number of instruments. Go to DRUM SELECT section and press INST. Then, select the bass drum via the BD INSTRUMENT button.
You will see the 16-step buttons turn purple, and depending on the instrument selected, two to three buttons will illuminate. Step 1 is the 808 sound, Step 2 is the 909 sound. If there is an additional purple-lit button in Step 3, this is either a modified kit sound (BD has a heavier, distorted 808 kick) or another instrument entirely… we will get to that shortly.
You can modify the decay and pitch (TUNE) of each instrument, with the bass drum and snare drum having individual ATTACK (or SNAPPY for snare) and compression controls (COMP) to cut through any mix.
BUT WHERE IS THE COWBELL?!?
Looking through the instruments from BD to RC, you might notice that there are some classic 808/909 sounds missing. The congas, maracas, claves and cowbell have all become iconic drum machine sounds in their own right, and were present in the original TR-808. Don’t worry… all of these instruments are in the AIRA TR-8 and here’s how you can access them.
Some instruments, when selected in DRUM SELECT – INST mode, have three options. This third instrument in Step 3 is one of these other 808 instruments. The LOW, MID and HIGH TOMS have their respective LOW, MID and HIGH CONGA. You can find the claves in the RIM SHOT instrument and maracas in the HAND CLAP. Finally, the original TR-808 had only one cymbal (RC) – the CRASH CYMBAL is actually the cowbell.
TIP #5 – PERFORMANCE MADE EASY WITH INST PLAY MODE
If you have followed Tips #1 through to #4, you will have quite a full pattern already, complete with all of the maracas and cowbells you could want. But say you want to add a few hand claps on-the-fly without recording it to the pattern. You just want to “play” the TR-8 to add some variety to your beat. You can with INST PLAY mode.
After programming your pattern and while it is playing, select INST PLAY. Use the 16-steps to play the corresponding instrument labeled below the STEP button. This is also a great way to work out the rhythm you’re hearing in your head, before going over to INST REC mode and recording the pattern.

TIP #6 – ADD ROLLS AND FILLS IN INST PLAY MODE
If you look at the 16-step sequencer, you will see Steps 12 – 15 marked ROLL. You can add either an 8th or 16th roll, or two variations of fills to your pattern in real-time performance. To play rolls and fills, select INST PLAY MODE, hold down the roll or fill you want and strike one of the eleven instruments from Step 1 – 11.
Another dynamic way to mix up your pattern is to use AUTO RESTART. If you hold down TAP and press the START/STOP button, the pattern will reset to Step 1. Tap in any rhythm with the START/STOP button and you can add a build-up with the push of a button.

TIP #7 – CHANGE THE FEEL WITH SHUFFLE & TEMPO
So your pattern is pumping away, but it feels very “stiff”? You might want to add some groove, some swing, some SHUFFLE!
The SHUFFLE knob changes the dynamic of certain hits and can push certain instrument strikes ahead or behind the beat. If you are into hip-hop beats, you will want to play with that SHUFFLE. At 12 o’clock, the beat stays straight on the count – move it clockwise to move your hits ahead of the grid, or turn it anti-clockwise for some behind-the-beat swing.
Key in the desired tempo with the TAP button to tap in your desired speed, or use the TEMPO and FINE knobs. The LCD display indicates the speed of the beat in beats per minute (BPM). The LCD display is a classic function found on the original TR-808 and continues to this day with the TR-8.
By the way, the original TR-808 didn’t have swing or shuffle. That was introduced in the TR-909. The TR-8 gives you shuffle for both, so get swinging!
TIP #8 – ADD REVERB TO YOUR BEAT
By now, you will have a pattern swinging away that’s filled with classic 808 and 909 sounds. But what makes the AIRA TR-8 stand out from the drum machines of yesteryear are the accents, effects and side-chain functions that can transform your classic beat into one that is truly your own. This section is where your creative voice as a musician will shine, inspiring hours and hours of beat-making and song producing!
If you have ever produced a beat, you know that adding reverb can make or break a great jam. Too much reverb and it will get lost in a mix, not enough and the whole track can sound a little flat. Having eight reverbs built-in, (specifically designed for rhythm) enables you to get that reverb mix right, straight out of the TR-8. Built-in effects keep you in the moment of creating, which is all-important when programming beats.
To program reverb to your beat, follow the same steps as in Tip#1. Select TR-REC, choose the STEP button in the REVERB section and then program the steps (1 – 16) that you want your reverb on. Easy!
Eight Types of Reverb
The eight different types of reverb that are onboard the TR-8 include Room, Plate, Spring and more. Using which kind is up to you. To change the reverb selection, press the INST button in the DRUM SELECT section and the STEP button in the REVERB section. You will see Steps 1 to 8 highlighted. These steps correspond to the reverb types shown below.

Adjust the LEVEL, TIME and GATE controls to taste. You might want a deep drum track, so crank that level! You might want to get that classic gated snare sound. Select your preferred reverb, place it on your snare hit steps and tweak the GATE control to cut just before the next drum hit. The power of reverb is at your fingertips!
The different reverb types of the AIRA TR-8 each offer their own unique sound. With just the onboard reverb effect alone, you can create some incredible variations on the AIRA TR-8 rhythms and tones. Spend time exploring the character of each reverb, as each reverb type sounds vastly different and can be used in many different ways.
TIP #9 – USE DELAY FOR SYNCOPATED EFFECTS
Adding delay to your drum hits is great for adding to your rhythm. Tweaking the TIME control can make the repeats sit on the beat or fill in the gaps between the beat.
Delay times can range from a few milliseconds to several seconds and can include a single echo or multiple echoes. Multiple repeats can be created by feeding a percentage of the delayed material back into itself, creating a more intense delay effect. On the TR-8, the FEEDBACK knob controls this principle. The TR-8 offers eight onboard delay effect types that are designed to be explored and exploited! These delays are synced to the tempo of your TR-8, keeping your rhythms locked and tight.
Programming Delay
Programming delay works in exactly the same way as adding reverb (refer to Tip #8). Select TR-REC, choose the STEP button in the DELAY section and then program the steps (1 – 16) that you want your delay on.
The eight different delay types that are onboard the AIRA TR-8 include Tape, Digital and Reverse delay effects. To change the delay type, press the INST button in the DRUM SELECT section. You will see Steps 1 to 8 highlighted, representing the eight delay types to choose from, as shown below.

Cranking the FEEDBACK control into self-oscillation is a great way to create a build-up and manipulating the TIME knob gets you some cool pitch-shifted sounds!
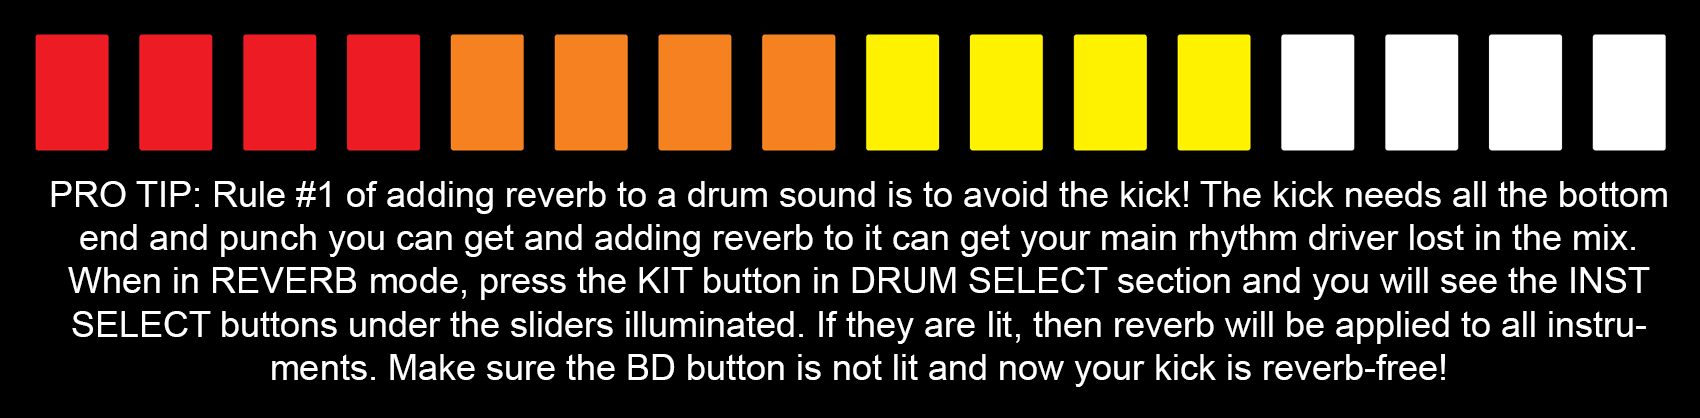
Control which instruments will be delayed by pressing the KIT button in the DRUM SELECT section. You will see the INST SELECT buttons under the sliders illuminated. If they are lit, then the delay will be applied to all instruments. Depress a button until not lit and that instrument is now delay-free.

TIP #10 – KEEP REVERB AND DELAY SETTINGS LOCKED TO A PATTERN
By default, the TR-8 keeps its reverb and delay settings when you change patterns. This is great when you are changing between patterns within a song or performance and don’t want it to sudden, wild variations. You can also set the reverb and delay choices to be stored within each pattern. Hold down PTN SELECT and turn ON. Press the KIT button so it’s lit up to save, per pattern. Press START/STOP to save.
TIP #11 – SIDECHAIN OTHER INSTRUMENTS WITH EXTERNAL IN
The TR-8 features two jacks marked EXTERNAL IN, located on the rear. These allow you to connect another instrument, sampler, synthesizer or drum machine to your AIRA TR-8.
Once connected, the external instrument can now be affected using the EXTERNAL IN section with the 16-step sequencer. Using the same procedure as programming reverb and delay, you can program a sequence that will either block or allow the external audio to pass through.
What is that SIDECHAIN control you might ask? Sidechaining is the process of controlling the output level of a secondary audio chain (SIDECHAIN or EXTERNAL IN) with your primary audio chain (in this case, the primary audio source is the drums of the TR-8). This is a common technique used to “duck” background music out of the way when someone speaks into a microphone. It has made its way into electronic music, with sidechain compression responsible for those huge pumping basslines.
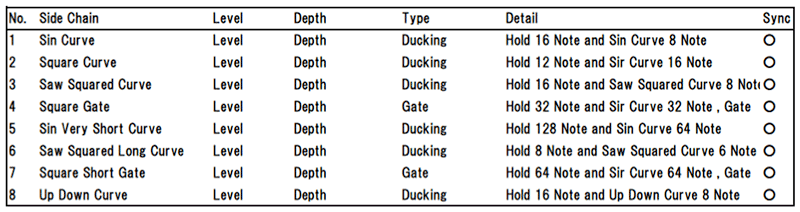
Eight Different Side Chain Types
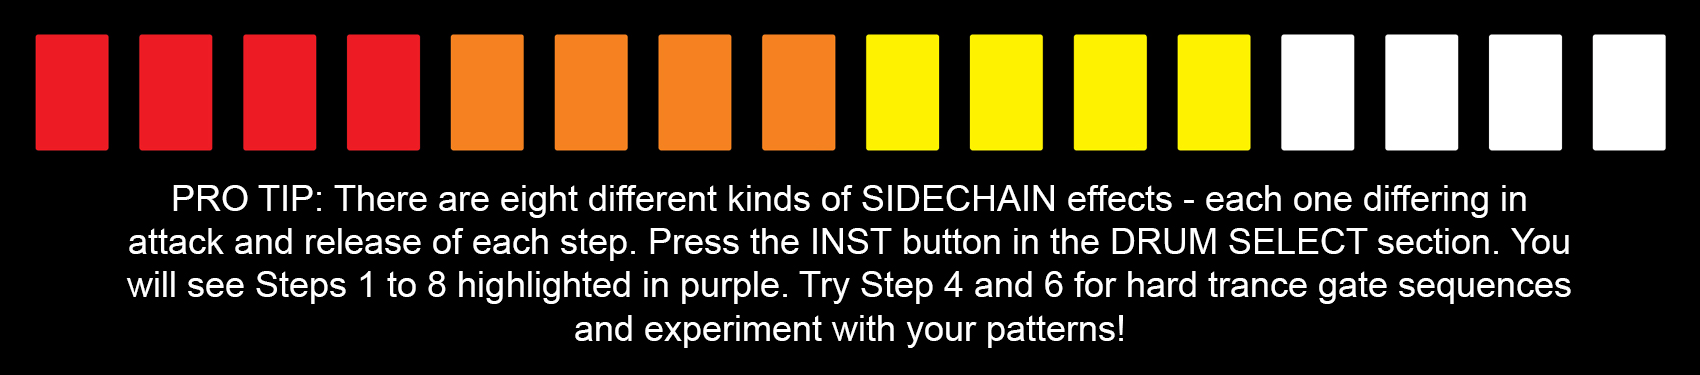
There are eight different sidechain types available with the TR-8, as shown below. Spend time exploring the shape and sound of each type, as they can create subtle and dramatic changes to your sound.
To use the EXTERNAL IN function in the TR-8, connect your instrument to the TR-8 and make sure it is playing. With both LEVEL and SIDECHAIN at zero, start turning LEVEL up until you can hear the external audio. Now follow the same procedure as Tip #1, #8, and #9.
Select TR-REC, choose the STEP button in the EXTERNAL IN section and then program a sequence using steps 1 – 16. Try Steps 1, 5, 9 and 13 – the first counts of each bar. Now start turning the SIDECHAIN control up and you will begin to hear the external audio being “ducked” in volume. Now you’re pumping!
On the AIRA TR-8, you can set whether the EXTERNAL IN is a stereo input or two mono inputs. To change the setting, hold down PTN SELECT as you power on the device. If PAD 4 is lit, the EXTERNAL IN is a stereo input panned left and right. If PAD 4 is unlit, it works as two separate mono inputs, with no panning. This is useful if you want to run two different instruments through the SIDECHAIN function, without them being split to the left and right of the speakers.
TIP #12 – CREATE SPACE IN YOUR DRUM MIX WITH PANNING
Panning allows you to balance the stereophonic image of your drum sounds. This is an important step when creating the right drum mix. Panning your drum sounds can help to recreate the panning of a typical acoustic drum kit, or it can be used as a creative production tool. To pan your drum sounds, press INST in the DRUM SELECT section. Select an instrument using the individual INST select buttons, found at the bottom of each volume fader. Hold the button and turn the TEMPO dial. The display reads C 0 when the instrument is centered. To pan left, turn the knob anti-clockwise (L1 – L64).
In some cases, you may want to separate the outputs of your drum sounds. See this article for more tips on ways to set up your TR-8
► https://www.rolandcorp.com.au/blog/tr-8-and-effects-part-2-pedals#setup
TIP #13 – MASTER THE SCATTER FUNCTION
Perhaps the most exciting feature in the AIRA TR-8 is the new SCATTER function. This effect is very powerful and once mastered, will give your live performances something very unique. This could be the sound that you will hear in future electronic dance tracks to come!
The SCATTER works by chopping up your pattern, in a rhythmic way, that adds a whole new variation to the term “fill”. There are ten types of SCATTER with ten levels of DEPTH. That’s 100 ways in which you can modify or mangle your rhythm track! Of the ten SCATTER types, there are slicer effects, reverse effects, pitch and filter effects… they are all there for you to experiment with and to make your own.
Using the Scatter
To use SCATTER, make sure your pattern is running, dial the SCATTER dial to 1 and hit the ON button (it should be lit when ON). You will now hear your pattern unlike what you first imagined. Press the DEPTH control and turn the SCATTER dial up. You will hear the SCATTER effect become more and more aggressive as it goes up to 10. Hit the ON button again to turn off the effect. Pretty powerful stuff, right?
But learning how to use the SCATTER effect with subtlety will make you a true SCATTER master. Want to know the secrets? Okay, read on…
Firstly, the more instruments you have playing, the more wild and aggressive the effect will be. There will always be the time to mangle your beat beyond recognition, but to use the SCATTER frequently, you will want to use it with some control. Keep the number of instruments playing simple, like bass drum and hand clap. Turn the SCATTER on, with DEPTH at say, 3. You should now hear a shuffling, reverse effect. Add in the snare. Next, add in hi-hats. Then, add in some toms. Hear how busy the effect is now?
So, first SCATTER tip: less is more.
Timing is Everything
Next, timing is everything with SCATTER. You don’t want the effect running the whole time. Practice turning on SCATTER on Step 9 and off at Step 16. Try and do this five times in a row. Once you can pull that off, try Step 11 to Step 16. Hear how different the SCATTER pattern is? The timing on each step will give a different fill/effect.
You can also set the TR-8 so that the SCATTER ON button is momentary and only works when pressed and held. To make this change, hold down PTN SELECT when powering on the device. By default, PAD 5 is unlit and the TR-8 is in LATCH mode. You press the SCATTER ON button once to turn the SCATTER on, and once to turn it off. When PAD 5 is unlit, the SCATTER ON button becomes momentary, i.e. it will only SCATTER as long as you hold the SCATTER ON button.
Last SCATTER tip: Try tweaking the SCATTER dial with DEPTH on while the SCATTER is on. Turn SCATTER on at Step 9, spin that dial and off again at Step 16. Depending on the SCATTER mode, this will give you some head-turning effects that will leave people on the dancefloor asking, “How did they do that?”
Becoming a master of the SCATTER will take some practice so you best get started!
TIP #14 – ADJUST INSTRUMENT GAINS
You can set the GAIN for each instrument so that when all the faders are at maximum (all the way up), your drum sounds will still be mixed in the way you want them to be. This is useful for live performances, as you don’t need to remember if a certain instrument needs to be a bit lower than the others are. To activate this, press KIT, then hold down the instrument button (BD, SD…) and turn the TEMPO knob.
TIP #15 – COPY YOUR PATTERNS
To copy the whole pattern, hold down PTN SELECT and choose your SOURCE pattern number. The LED will say COPY. Then, press your DESTINATION pattern number. Or, to copy particular instruments, make sure you’re on the SOURCE pattern to start, and then hold down PTN SELECT. Choose your instruments using the instruments buttons below the faders (BD, SD, etc.). Then, press your DESTINATION pattern location.
TIP #16 – LOCK A PATTERN SO IT CAN’T BE CHANGED
When performing, you might want to make sure that the steps are set and cannot be changed. Hold down PTN SELECT and turn the TEMPO knob to change between steps being locked ON and OFF.
TIP #17 – RANDOM PATTERN
Sometimes the best ideas come from accidents. For some inspiration, try creating a random pattern. To create a random pattern, hold down PTN SELECT and press SCATTER ON. To save it, press the TR-REC button.
TIP #18 – LEARN THE KIT COLOUR CODES FOR FAST ACCESS TO YOUR SOUNDS
AIRA TR-8 System Program update v1.11 introduces colour codes for your kits when in INSTRUMENT mode. This lets you match instruments when editing a kit, and to easily identify which kit you are currently playing. The code is:
Pink – [TR-808]
Yellow – [TR-909]
Orange – [TR-707]
Blue – [TR-727]
TIP #19 – SELECT ALTERNATE SOUNDS [7X7 ONLY]
The 7X7-TR8 Drum Machine Expansion contains some instruments that contain an alternate sound e.g. the 707 bass drum has both BD1 and BD2 in the same step. This allows you to create more complex patterns and variations by accessing more sounds.
To program an alternate sound, go to TR-REC mode, hold down the INSTRUMENT button and press the programmed step. The step pad should change from red to pink.

TIP #20 – SPECIFY FLAM AND SPACING [7X7 ONLY]
A flam is a note (or series of notes) written ahead of the main beat and takes on the effect of a grace note. The original TR-707 only allowed flam strikes on the snare and the toms. The 7X7-TR8 Drum Machine Expansion allows you to program a flam strike on any instrument of any kit and control the flam spacing.
To program a flam, hold down the TR-REC button in TR-REC mode and press the programmed step. The pad should be lit purple.
To specify the spacing, hold down the TR-REC button again and turn the TEMPO knob. You can choose no flam (0) and spaces 1 – 8.
TIP #21 – ASSIGN SOUNDS TO DIFFERENT OUTPUTS
By default, all sounds are assigned to the MASTER OUT. To change this, hold down PTN SELECT while turning ON, then hold down A or B, and select drum sounds or EXTERNAL IN STEP to send your chosen sound out to (A or B) ASSIGNABLE OUT. Once you’ve set your sound how you want, press START/STOP to save your change. This is useful if you want to mix the kick and snare separately. It also enables you to route the external inputs through these secondary outputs with better flexibility, while retaining the ability to sidechain that signal.
TIP #22 – RUN MONO INSTRUMENTS INTO THE EXTERNAL INPUT
By default, the EXTERNAL IN is set to a stereo input, panned left and right. But what if you want to use it to run 2 mono instruments through it? To change the stereo configuration to two mono inputs, hold down PTN SELECT and turn the TR-8 ON. If Step 4 on the step sequencer is lit up, the EXTERNAL IN is stereo. Turn it OFF and the EXTERNAL IN will be mono. Press START/STOP to save.
TIP #23 – LOWER YOUR OUTPUT VOLUME FOR MORE HEADROOM
The AIRA TR-8 is set to play live, but if you’re running it into external studio effects like a preamp or compressor, you might want a lower volume. The boost on the main output can be removed. To change this, hold down PTN SELECT and turn ON. If Step 3 on the step sequencer is lit up, the main outs are boosted. Press START/STOP to save.
TIP #24 – MAKE THE MOST WITH MIDI
To get the most out of your AIRA TR-8, an understanding of MIDI is crucial. MIDI allows you to send and receive digital information, instructing your devices on how they should behave. Use the MIDI settings below to make your life easier, both in the studio and on stage.
You can synchronise the TR-8 to the MIDI Clock of another external device through the MIDI IN at the rear of the TR-8. Alternatively, you can use the TR-8 as the Master Clock, from which you can sync external gear via the MIDI OUT. To set the MIDI Clock, hold down the PTN SELECT button while you power on the device. If PAD 1 is unlit, the INTERNAL setting is activated. This means that the TR-8 will operate at its own specified tempo, and prevents the device from synchronising to other external devices.
When PAD 1 is lit, the tempo of the TR-8 will automatically sync to any USB or MIDI Clock input. If both inputs are active, the USB will take priority over the MIDI input. Press the START/STOP button to save these MIDI settings.
The TR-8 is also capable of MIDI Thru. This is set with PAD 2. As you do when setting the MIDI Clock, you access this setting by holding down the PTN SELECT button while powering on the device.
When PAD 2 is lit, MIDI THRU‘s ON is activated. The information received via MIDI IN will be re-transmitted from MIDI THRU via the MIDI OUT. When PAD 2 is unlit, MIDI THRU is turned OFF and the TR-8 will not re-transmit MIDI data.
NOW RECORD THAT MIDI!
Connecting the AIRA TR-8 to a computer via USB enables you to record MIDI data directly from the machine and into your DAW, without the need for an external sound card. Furthermore, you are able to send recorded MIDI information from your DAW into the TR-8.
Use the TEMPO knob to change which MIDI channel the TR-8 sends and receives data on. As with most MIDI-compatible drum machines, this is Channel 10 by default.
To change the way your TR-8 sends and receives MIDI data, hold down LAST STEP and turn the SCATTER dial.
- When SCATTER 1 LED is blinking, the device is set to Local Off, which produces sound only through external MIDI messages.
- When SCATTER 2 LED is blinking, the device is set to Local On, which allows the TR-8 to produce sound through any operation, including external MIDI messages.
- AND When SCATTER 3 LED is blinking, the TR-8 becomes a MIDI controller. This is displayed as CTRL 1 mode. It means that the TR-8 will not produce any sound, and will only output MIDI information.
TIP #25 – GET THAT AUTHENTIC 808 AND 909 FEEL
The AIRA TR-8 offers many hidden features that really take the sound and feel of the machine to the next level. 808 and 909 modes make the TR-8 behave in ways typical to the original TR-808 and TR-909 drum machines, allowing for a more authentic playing experience.
The original TR-808 drifted slightly at faster tempos (like those heard in Drum and Bass) and snapped back at the end of a bar. If you like the sound and feel of the original 808 groove, set your TR-8 to this timing by holding down PTN SELECT and turning the device on. If PAD 7 is unlit, the TR-8 will operate with traditional TR-808 timing. When PAD 7 is lit, the TR-8 operates with modern, super-solid timing, bang on the beat every time!
The original TR-909 had both open and closed hi-hats on the same volume control, to replicate the limitations of a real, acoustic drum kit. When PAD 8 is lit, the TR-8 operates in 909 mode, and both the open and closed hats are controllable via the CH volume control. When PAD 8 is unlit, the separate CH and OH volume controls are active.
Use these modes to experience the feel of the original machines, and to further customize your TR-8 to your preferred playing style!
TIP #26 – LOCK YOUR SCALE
If you accidentally press the SCALE button in a live scenario, it can really mess with your timing. To avoid any messy accidents, you can lock this button down. Hold down PTN SELECT and turn ON. Press the SCALE button so it’s lit up to lock. Press START/STOP to save. When locked, hold down the SCALE button and turn the TEMPO knob to change scale.
TIP #27 – CHANGE THE LIGHTS
You can change the lights on your 16 steps to make the TR-8 your own. Hold down PTN SELECT while you turn it on. Then hold down DEPTH and change the SCATTER knob. There are 6 different colour modes for the STEP buttons.
1 = Normal (TR-808 Colours)
2 = Dimmed lights
3 = Blue / Purple/ Pink/ pale Pink
4 = All Green
5 = White / Red / Green / White
6 = Magenta / Purple /Pink / White
TIP #28 – SEQUENCE SAMPLES USING YOUR TR-8
With the TR-8’s 1.5 update, you can incorporate your own samples into your beats by sequencing an external sampler, like the Roland SP-404A. This feature is great for mixing ACB drum sounds with other sounds, whether it be other drum hits, melodic elements, your own sounds or any other audio you like!
It’s possible to layer your TR-8 sounds with your own sounds, use the TR-8’s effects with them, and create a different soundscape than if you were to use the TR-8 by itself.
Because the external sampler is connected to the EXTERNAL IN, it is coming through the TR-8’s SIDE CHAIN. You can now sidechain your samples with your TR-8 beat. This is great for melodic elements and chords in combination with beats.
RELATED ARTICLES
THE ULTIMATE GUIDE TO THE AIRA TB-3 TOUCH BASSLINE
THE ULTIMATE GUIDE TO THE SYSTEM-1 PLUG-OUT SYNTHESIZER
TR-09 VS. TR-8
1 – TR-8 AND EFFECTS : ONBOARD EFFECTS
2 – TR-8 AND EFFECTS : PEDALS
3 – TR-8 AND EFFECTS: MODULAR EFFECTS
USING SAMPLES WITH YOUR TR-8 RHYTHM PERFORMER
RELATED PRODUCTS