Paul White, Editor-in-Chief of Sound on Sound Magazine, shares tips to help you spend more efficiently on your home recording studio
Home studios are wonderful things, and other than the pleasure they give the user, they can also be expanded gradually to increase facilities and to improve quality. However, I’ve seen home recording studio owners spend alarming amounts of money on things that I know are going to make little or no difference, so how should you deploy your budget?
To put things into perspective, many of the ‘classic’ records that were made back in the days of analogue tape were made on equipment that would be outclassed by somebody today running Apple’s Garage Band on an iPad or laptop. Ok, they had some good mics and nice mixing desks, but what really made those records sound so good?
A good song goes a long way
It may sound really obvious but the main ingredient is a good song, well arranged and well performed. A strong song performed well and recorded to 80% technical perfection will always sound more appealing than a poor performance and/or poor song recorded to 99% technical perfection. There’s a temptation to throw technology at imperfect performances but in most instances that doesn’t produce worthwhile results. Unless, the performance is already pretty close to right. The perfect example is the human voice. If your singing isn’t as good as it might be, then please, spend the money on a few good vocal coaching sessions. Not on some automatic pitch tuning software — you’ll be glad you did and that money will never be wasted. If you pitch-correct a bad voice devoid of emotion or the ability to phrase properly, it will still sound poor.
4 Proven Tips To Inspire Your Songwriting Pt.1 – Inspiration is Everywhere!
Acoustics
But lets assume you have a good song, you’ve arranged all the parts and you’re well rehearsed. This is where the home recording studio scores as you can spend time instead of money getting things right. However, what does a professional studio have that you might not? No, it’s not all the fancy gear — it’s an acoustically appropriate space in which to record. This could mean a fairly dead booth for the vocals, a large space for electric guitars or a particularly nice-sounding live room for drums.
Thanks to modern day convolution reverbs, the acoustics of all these spaces can be added during the mix but there is a catch. Your original recording needs to be free of the effects of adverse-sounding room acoustics before you start. Adding artificial reverb to a boxy sounding recording doesn’t make for a great end result. Domestic rooms might sound OK when you are chatting to your mates but for recording, they can come across as boxy and unpleasant. This is most obvious on vocals — but fortunately it’s the easiest to do something about.
Know your home recording studio frequencies
When it comes to acoustic treatment, the lower the frequencies, the more elaborate the treatment needs to be. Fortunately the human voice doesn’t contain low bass frequencies so we can stifle those unwanted room reflections by improvising a vocal booth out of simple polyester duvets. This is something I’ve mentioned in the past and will no doubt repeat in the future but it does make a huge difference. Hang up two thick duvets in the shape of a V and then stand with your back into the point of the V when singing. You’ll get pretty clean results in most domestic rooms. Hang another folded duvet behind the microphone and you’ll have near pro studio quality results with absolutely no outlay. Assuming you already have duvets around the house.
Other critical acoustic instruments can be recorded in the same way but close-miked electric guitar and DI’d bass guitar work in pretty much any room. Drum kits are the hardest things to get right in a small home recording studio. If the recording is an important one, then consider using some of your budget to book a few hours in a suitable pro studio to record the bare bones of the track including good drum parts. Alternatively, as most systems these days are portable, do the recording somewhere that sounds appropriate — maybe a church hall, youth club, school room or whatever works.
How To Record A Whole Band In Your Home Studio
Kill the reflections
If you want to get a good drum sound at home, then you could use more duvets to try to dry up the room sound. Make sure you have something absorbent between the overhead mics and the ceiling to kill reflections. That’s where most of your quality will otherwise be lost. Foam tiles will do or even cushions if you can find a way to suspend them. The close mics on individual drums aren’t such a problem as the ratio of direct sound to reflected sound is very high.
Taking time to ensure that the instruments are recording how you want them to is paramount. Move the mics, change the amplifier settings, put on new strings if necessary and don’t assume you can fix everything in the mix because most times you can’t. Talking of strings, make sure that all stringed instruments are correctly set up and play in tune with true intonation. If they don’t, you can make most of the simple adjustments yourself and there are plenty of Youtube videos to show you how. This is another example of how spending time rather than money can help things pay off.
Choosing the right Vocal Microphone
Believe it or not, if you’ve got this far you’re already most of the way to making a good recording. I’m firmly of the opinion that something like 80% of a good recording happens before the sound reaches the microphone. Yes you have to choose the right type of mic and put it in the right position but guess what, the most expensive mics don’t always give you the best results. This is especially true with vocals. It is more important to find a mic that suits the voice. Something that is perhaps most important with female vocalists as they generally produce more high frequencies than males. Just try every mic you have or that you can borrow and see what sounds the most musical. Don’t worry about the spec sheet or whether or not it has valves and transformers in it.
To put this in perspective, have you ever watched a live concert video and seen what mics they’re using? Often they are standard dynamic models yet the vocals still sound good. Don’t get too hung up on expensive mics. If you do find one that works for you, then by all means buy it if you can afford it. It should last a lifetime, but don’t feel you have to spend tons of money to get quality. And if you only have the old SM58 you use for gigs, try that. The chances are that it will sound just fine.
Microphones for other instruments
As to miking the other instruments, read the reviews in reputable audio mags such as Sound On Sound and see what’s around in each price bracket. There are plenty of reasonably priced mics that work perfectly well on acoustic guitars, percussion, guitar cabs and other common instruments. Same deal with mic preamps. The difference between a high end Neve mic preamp costing hundreds of pounds and the mic amps built into a mid-priced audio interface is not as great as you might imagine and in a blind test many people can’t even tell which is which. A very wise friend of mine once said when discussing recording gear, ‘Will it affect sales?’, by which he meant record sales.
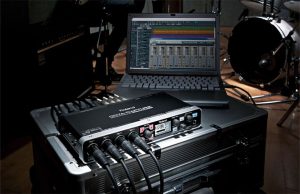
Audio interface price, performance and connectivity
And talking of audio interfaces, I’ve tried a great number from seriously budget to esoterically expensive. Again, though there’s a difference in the paper specification, the human ear detects less of a difference. Indeed, it’s the sound of the mic preamps built into them that tend to dictate the tonal quality. As stated in the previous paragraph, once you get out of the entry level price bracket, the subjective differences are actually quite small — certainly far smaller than the difference between what you put into a tape recorder and what comes out again on playback.
The price of audio interfaces understandably increases depending on the number of inputs and outputs they have. If you are a solo singer/songwriter who records one part at a time, or maybe a guitar and voice at the same time, then an interface with two inputs will suffice. There’s no point buying one with more inputs if you’re never going to use them.
Computers are relatively inexpensive, there’s plenty of music software that differs more in facilities than it does in sound quality. This means pretty much any setup will give you lower noise, lower distortion and more operational flexibility. Better even than the analogue tape-based studios used to record those classic records we all love so much. However, you do have to be able to hear what you’ve recorded and you have to hear it as honestly as possible. This means setting up the best monitoring system you can for your home recording studio.
Which Audio Interface Is Right For You?
Small changes, Big results
I could write a whole article on this subject alone, but the basic rules are:
*Buy studio monitors, not hi-fi speakers and read the reviews to see what models come out top in your price range.
*Always aim your speakers down the longest length of a rectangular room rather than across it.
*Don’t put big speakers or subwoofers in small rooms. It will just make the bass end sound messy and inaccurate.
*Hang acoustic absorbers, which can be acoustic foam, mineral wool insulation slabs or even folded duvets, either side of your listening position and ideally behind the speakers too. This will cut down on confusing reflections.
*Put the speakers on solid stands or isolation platforms. No budget? Get a couple of squares of 50 to 100mm thick furniture foam, put a heavy floor tile on top of each one and stand your speakers on those. The bass will be tighter and the stereo imaging better.
*A domestic room is never going to be perfect, even with all the above tweaks. Get yourself some decent headphones (open-backed are best for mixing) and double check everything you do on those.
*The other subject that could fill an article is that of cables. In my experience, esoteric cables make very little if any difference but it does pay to buy cables with good quality connectors fitted to them, Neutric being a safe bet at a sensible price. Neutric make both XLR and jack connectors that include robust strain relief. This means the cable is less likely to pull out of the connector. Anybody using Neutric connectors to make cables is also likely to be using adequate quality cable.
Don’t overdose on plug-ins
Finally, when doing your mix, don’t go overboard on plug-ins. As essentials you need a decent reverb, some delay, EQ and a compressor. All the rest is optional. What’s more, you’ll get a lot more out of learning to use a small selection of plug-ins properly than you will playing around with dozens that you’re not really familiar with. I often tell the story of how I was asked to help somebody with a mix. I’ll take a look at what they’ve done while they go to make the tea.
Often they come back saying ’It sounds better already’. Only to find that all I’ve done is bypass all their plug-ins to see what the raw recordings sounded like. You don’t need a lot of fancy plug-ins. In most instances, if you’ve taken care in getting the right sounds at source, you’ll need very little EQ. Other than some low-cut filtering to get rid of unwanted lows. Such as anything that isn’t a kick drum or bass instrument.
In summary
To wrap up then, always see if there’s a choice between spending time and spending money. Where possible, spend the time. That doesn’t mean you should always buy the cheapest of course. As that too can be false economy as you may need to upgrade your poor choices at a loss. Try to figure out where the weakest links in your home recording studio chain are located and address those first. If you do need to buy something more up-market, make sure it is something you really need. Something that it is likely to have a long lifespan. There has never been a better time to make your own recordings. Don’t get lead astray by the gear geeks! Just use your ears.
Related Products