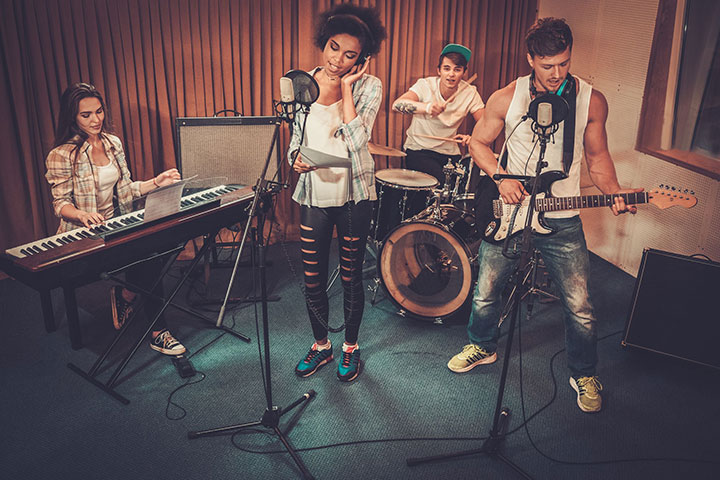
Before the recording home studio was commonplace, music recording required a considerable investment in hardware. Commercial studios were one of the only ways to access sophisticated recording equipment. In today’s world, recording a band at home has become a lot easier.
While it can seem daunting at first, producing quality mixes at your recording home studio is a perfectly achievable goal. All it takes is some recording/mixing knowledge, and some key pieces of equipment:
– An audio interface
– Recording software (DAW)
– Studio monitors
– Basic room acoustic treatment
– Suitable microphone(s)
Selecting a home recording audio interface
When recording a band at home, you’ll need a way of getting high quality audio in and out of your computer. Most audio interfaces for home studio use connect to the computer via USB. These have inputs that allow you to connect an electronic instrument such as a keyboard, an electric guitar or bass, or a microphone. Condenser microphones require what’s known as phantom power, a 48 volt power supply provided by the device into which they are plugged. You’ll need an interface that can provide phantom power if you plan to use a capacitor microphone or active DI (Direct Injection) box.
Midi
The simplest audio interfaces have just one or two audio inputs and a pair of audio outputs to drive your monitors. In most cases there is an included headphone output. This is essential if you want hear what your mixes really sound like without misleading room acoustics. Using a MIDI controller keyboard to access the software instruments that come with your recording software (or that can be bought as third-party plug-in add-ons) means your choice of interface will also need to include MIDI In and Out ports. This is provided as 5-pin DIN sockets so that you can plug your MIDI cable straight in. Some controller keyboards can connect directly via USB but having standard MIDI ports is always useful. This makes it easier to connect external sound modules or synthesizers in your recording home studio.
Input/Output
The simplest audio interfaces have just one or two audio inputs and a pair of audio outputs to drive your monitors. In most cases there is an included headphone output, which is essential if you want hear what your mixes really sound like without misleading room acoustics. However, if you’re recording a band at home you’ll need a more sophisticated audio interface.
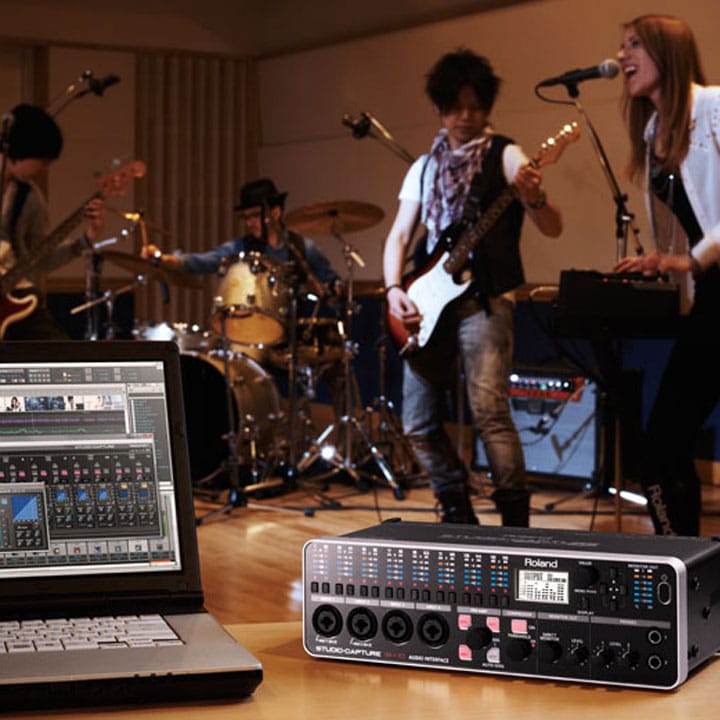
The Studio Capture can record up to 16 inputs at the same time, 12 of which can be microphones. It also provides up to 10 outputs in addition to the main monitor outs feeding your speaker. You may not have an immediate use for all of them, which means you’ll be ready to explore surround and immersive sound when the time comes.
This will also give you more freedom in connecting hardware studio processors should you wish to. 16 inputs come in handy even with a small band. You’ll probably want to use quite a lot of microphones around the drum kit. If you find you need more inputs you can hook up two of them to double your number of inputs. Another practical point is the meters on the front panel. These make keeping an eye on signal levels easy in your home studio.
Which Audio Interface Is Right For You?
Input Gain
Within the studio capture lies the tools to make recording a band at home as easy as possible. With any recording device you set the input gain level so that you record a healthy signal level. Too high and you run into distortion. Too low and the level becomes too quiet. Studio Capture is equipped with Auto-Sens that automatically sets the input gain level for you. Leave it on while you rehearse the part you are about to record. It will learn from what you play and set the input gain for you based on the loudest parts it ‘hears’.
Band Home Recording Techniques
Now to introduce a word that you may have heard mentioned in the context of recording a band at home — latency. Computers are very fast but there is still a slight delay between what you feed into them and what comes out. The degree of latency depends mainly on the ‘buffer size’. This is a small reservoir of data used by the computer to make sure that there are no breaks in the audio data stream when it turns its attention to something else. Such as accessing a hard drive or updating the screen graphics.
The trick is to use the smallest buffer size at which your system will still run reliably without any breaks or glitches in the audio output. Even then, some plug-in effects and instruments increase the basic latency so are best switched off until you come to do your final mix. Latency has no effect when mixing, only when overdubbing new parts. You can use all your favourite plug-ins when mixing and set the buffer size as high as you need.
Roland’s engineers have made advances using their VS Streaming Driver technology to maintain reliability and keeping latency as low as possible. There’s a direct monitoring control that allows the input to be heard in the headphone or speaker output (or a mix of the direct input and any signal coming back from the computer) when recording. This means you’ll hear no latency. This is especially useful for when recording a band at home.
Band Headphone Mixes
Vocalists often perform better if they have a bit of reverb in their headphones so Roland have included a DSP reverb as part of the UA1610 that can be applied to the direct monitor signal. If different performers need different headphone mixes, no problem! The Control Panel software allows you to set up four different headphone mixes — just connect the corresponding line outputs to your own headphone amplifiers.
Why four different headphone mixes? Different musicians usually want to hear a different balance of the other performers. For example, vocalists need to hear the harmonic content and other vocalists clearly. The drums and bass, however, may not be as high of a priority. Bass players need more of the drummer. Taking time to set the correct headphone mix for each performer can lead to a much better performance.
WHICH HEADPHONES ARE RIGHT FOR ME?
Sound Quality in a Home Recording
Sound quality is related to both the quality of the analogue electronics, such as microphone preamps, and the digital audio recording format. Today any serious audio gear needs to record at 24-bit resolution. The sample rate of a standard CD is 44.kHz. Those who are very serious about sound quality may choose to record at double or even four time this sample rate. Many interfaces support sample rates up to 96kHz but the Studio Capture can run at up the 192kHz if you need to. Even at the basic 44.1kHz sample rate, the audio recording quality is significantly better than that of even the most costly tape machines.
The software driver (available for both Windows and macOS) comes on a CD ROM. If your computer doesn’t have a CD ROM drive, you can download the latest version from the Roland web site. The software also includes an on-screen control panel to provide easy access to any parameters you may need to adjust.
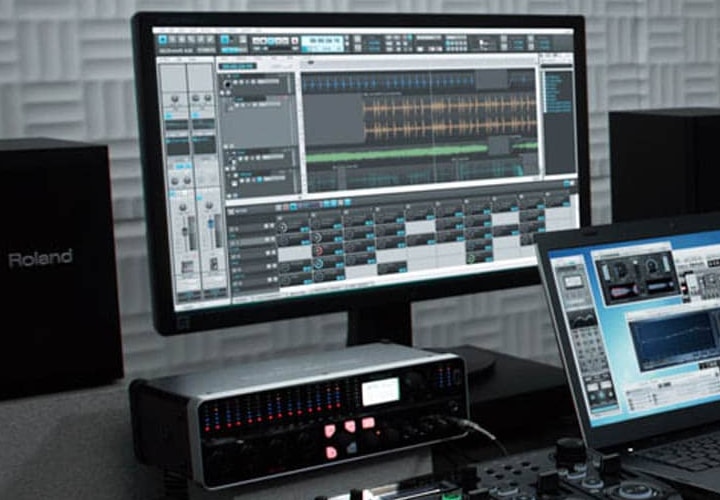
Selecting Home Recording Software (DAW)
There’s a wide choice of recording software for both macOS and Windows, ranging from relatively simple ‘lite’ packages to extremely sophisticated pro products. We term these DAWs or Digital Audio Workstations, and most will work seamlessly with the Roland Studio Capture. Whenever somebody asks me which one they should buy, I usually tell them to see what their friends use. That way, they get free ‘tech support’ while they are still finding their feet.
Other than that, if you plan to add vocals or acoustic instruments, you’ll need at least one microphone. In order to hear what you’ve recorded, you’ll also need some accurate headphones and a pair of studio monitor speakers. “Active” studio monitors are the most common choice as all the necessary electronics, including the amplifiers, is built right into the speaker cabinet. This makes setup very easy in the home studio.
Home Studio Monitors and Room Acoustics
If your home studio is set up in a small domestic room, don’t be tempted to buy speakers with a hugely impressive bass end. They tend to produce misleading results in small spaces. For rooms up to around 3 metres long I’d suggest monitors with between 4 and 6 inch diameter bass drivers. In rooms up to 5 metres long, a monitor with a 6 to 8 inch bass driver would be appropriate. Systems with large subwoofers are only really suitable for large studio spaces.
Speaker setup
Set your speaker system up as symmetrically as possible. Avoid placing the monitors in corners as that can cause problems with bass frequencies. Monitor stands can improve the sound where the monitors are standing on a desk. They also help to get the speakers at the right height for your ears. Ideally the tweeters should be aimed towards your forehead when you are leaning back in your chair. This can often be achieved by angling the speaker supports. Avoid wobbly speaker stands as monitor speakers need to be mounted on something stable to deliver their best performance. Most monitors come with useful advice on positioning so always read the manual. There may be rear panel controls to adjust according to your room type and speaker position.
Home Studio Arrangement
The way you arrange your room can make a big difference to the accuracy of your monitors. In a small to medium sized domestic room, always arrange the monitors to aim down the longest axis of the room. Square rooms tend to introduce more unevenness in the bass response of monitors, especially if the width of the room is similar to its height. If you have to work in a small square room, always use headphones to confirm what the bass end of your mixes really sounds like. Be aware if you listen at the center of a small square room. The amount of bass you hear from your speakers is likely to be less than the real level of bass in your mixes.

Controlling Frequency Response
There’s little you can do to even out the bass response of speakers set up in small rooms. However controlling the mid and high frequencies is easier and worth doing at home. The simplest solution is to use acoustic foam panels of between 50 and 100mm thick. You only need a few of these to make a big difference and the best place to put them is at the so-called mirror points. If you get a friend to hold a mirror flat against the wall while you sit in your usual mixing position, any place you can see a reflection of either speaker is where an acoustic panel needs to go. Usually this means having a panel either side of you at head height and slightly forward of your position with another panel or two behind the speakers.
There’s also a benefit in putting a couple on the back wall if it isn’t already occupied with shelves or furniture. In rooms with low ceilings, an extra panel on the ceiling above you at a mirror point can help.
While you can fix foam panels to the wall using spray adhesive, taking them down again can be a messy job. One solution is to glue a couple of old CDs to the back of the panel close to the top edge. Then hang the panel on a couple of pins or screws, positioned to line up with the center holes of the CDs.
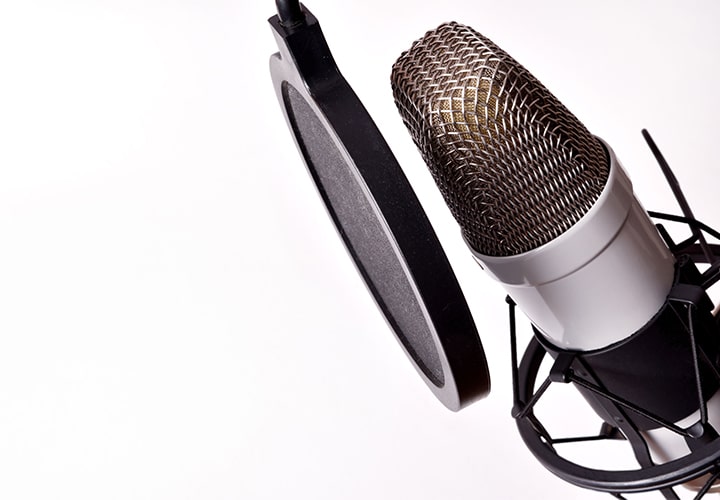
Recording and Mixing Vocals at Home
Tracking vocals at your recording home studio is actually not difficult. By taking a few precautions to reduce sound reflections from around the room, your recordings will sound less boxy. Always use a pop screen in front of the mic. Otherwise blasts of air when enunciating P and B sounds can cause loud popping that is almost impossible to remove at a later stage.
In terms of selecting a microphone for recording vocals, please see the “Microphone Basics” section below.
You may have seen commercial curved screens that go behind the mic. These are designed to help dry up the room acoustics. They can help, but in my experience it’s the reflections from the wall behind you that cause the biggest problems. An easy solution is to set up a spare tall boom mic stand in a T shape behind the singer and hang a duvet over it. This will really help to clean up the sound, as adding compression further down the line will only emphasises poor acoustics. You can still put a screen (or another duvet) behind the mic too because every little bit helps.
Recording other Instruments in your Home Studio
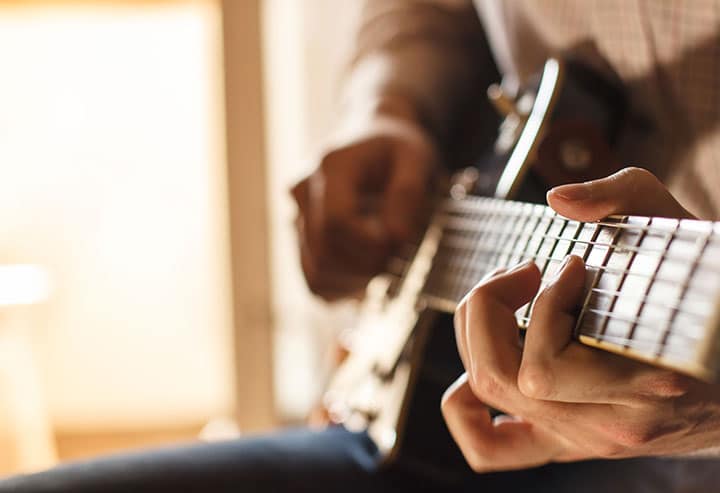
For recording acoustic instruments such as guitars, you’ll find lots of advice on-line and in magazines. I’d suggest you experiment further to find the best place for the microphone. It will vary depending on the instrument itself and on room acoustics. If you listen on headphones as you move the mic around, you’ll soon find that magic ‘sweet spot’. The more effort you put into getting the sound right at the source, the less you’ll have to rely on plug-ins to rescue a poor recording.
Plugins
While there are hundreds of plug-ins that do all kinds of wondrous things, the four you need to concentrate on are Equalisation (EQ), Compression, Delay/Echo and Reverb. If you’ve taken care with your recording, you shouldn’t need a lot of EQ to make things sound good. It can be helpful however, to use low-cut EQ to remove unwanted low frequency. These may include sounds such as vocal breaths, passing traffic or floor vibrations. The easy way to set this up is to gradually increase the frequency of your low cut filter until you can just hear it affecting the voice or instrument, then back it off just slightly. It is a simple trick but it will make your mixes sound a lot cleaner.
Time Based Effects
Reverb and echo can make a vocal sit more naturally with the backing instruments. However, be aware that too much reverb can take away the sense of presence and closeness in a vocal part. A common technique is to combine a very subtle delay/echo treatment with a hint of reverb. Experimenting with this may take some time. Always make your final adjustments to effects and EQ with the whole track playing. The way something sounds in the final mix depends on what else is playing at the same time. What sounds like too much effect in isolation may sound like too little when everything is playing.
Compression
Compression is used to even out the level of sound such as vocals, acoustic guitars and basses. You can think of a compressor as something that reduces the level difference between quiet and loud sounds. This helps create a more even sound but it can also bring up the level of room ambience and background noise. For that reason don’t overdo compression — use you DAW’s mix automation to take out the worst of the level change. Adding compression after this will give your track a final polish.
A typical compressor has a threshold control to set what level compression starts to take place. Below it, no gain changes are applied. Once the signal is above the threshold, the ratio control sets how much gain reduction is applied. The higher the ratio, the stronger the compression effect. The attack and release controls set how quickly the compressor responds to changes in input level, however you’ll often find presets or suggested settings for different applications. In that case the only control you still need to adjust is the threshold. The lower the threshold the more gain reduction is applied as more of the signal is above the threshold. There’s usually a make-up gain control to restore any overall level lost by compression.
Balance
While you are gaining experience in mixing, the main thing to concentrate on is the balance between the parts. To avoid escalating levels, it is usually best to turn down the levels of parts that are too loud. It can help to start out with just the bass and drums to create a solid foundation for your mix, then add the other parts as needed. I favour bringing in the vocals fairly early on so that as the other instruments are introduced, they are not allowed to obscure the vocals. One tip that the pros often pass on is to listen to the overall balance from outside the room with the door open. Anything that is too loud or too quiet suddenly becomes very obvious!
Finally, always check out your mixes a day or two later on as many speaker systems as possible, including the car stereo. This will show up any balance issues that might be down to your studio acoustics. Now you can go back and tweak your mixes as necessary.
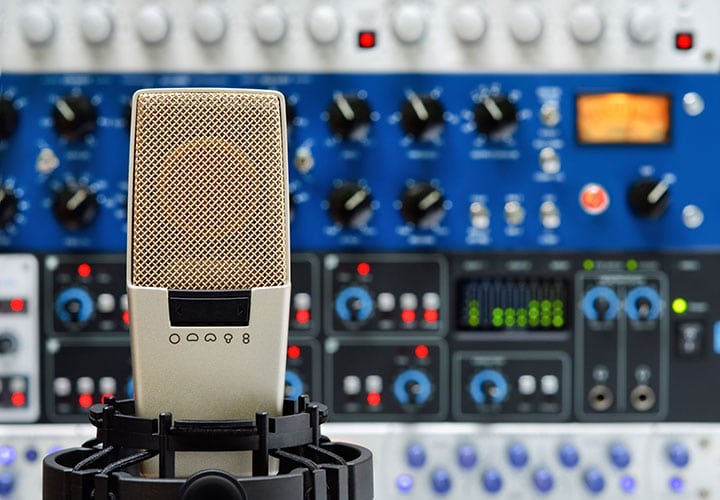
Microphone Basics
There are three basic types of microphone: moving coil dynamic, capacitor (also called condenser) and ribbon. They all do the job of converting sound into an electrical signal but work on different principles and have different strengths and weaknesses. When recording a band at home, it’s good to know the difference in application!
Dynamic
When Recording in a home studio, dynamic microphones can be very useful. Most common are moving coil dynamic microphones. These are especially popular in live sound because of their affordability, robust construction and lack of electricity required to operate. Most moving coil microphones start to become inefficient at frequencies above 16kHz or so because of the inertia of their moving parts. Even so, they are popular for recording drums, electric guitars, brass instruments and also vocals.
Capacitor
Capacitor microphones are very popular for studio recording as they respond to high audio frequencies much better than moving coil microphones. Electronic circuitry is required to generate an audio signal from the diaphragm’s movement, which is why capacitor microphones need electrical power to operate. Most mic preamps, mixing consoles and serious audio interfaces with mic inputs provide the necessary 48V phantom power that is fed via a standard (balanced) XLR mic cable. Note that valve or tube microphones invariably have their own external high voltage power supply, so phantom power is not required.
As a very general rule, small diaphragm capacitor microphones are used for instrument recording where a higher degree of accuracy is required. Large diaphragm models tend to have more of an inbuilt tonal ‘character’ and are often chosen for vocal recording.
Ribbon
Ribbon mics are less popular than capacitor or moving coil microphones. This is because they produce a very low electrical output and are less robust. Where they do score is that they produce a smoother-sounding high end than most capacitor microphones. This makesthem popular for some vocal styles and drum overheads. Typically, because they can produce a less brash cymbal sound than capacitor mics.
Polar Patterns
How a microphone responds to sound coming from different directions is defined by its polar pattern. There are three main polar patterns: Omnidirection (or omni), cardioid (or unidirectional) and figure-of-eight. Some capacitor microphones have switch-selectable polar patterns. Knowing the application of polar patterns is crucial for recording a band at home.
Omnidirectional microphones pick up sound equally well from any direction and tend to have a very natural sound.
Unidirectional mics pick up sound mainly from one direction. Several widths of the cardioid pattern are available where narrower settings are usually termed hyper-cardioid or super-cardioid. Most home recording studio vocals are recorded using large diaphragm cardioid pattern, capacitor microphones. The majority of moving coil dynamic mics have a unidirectional polar pattern.
The figure-of-eight pattern mic is equally sensitive both front and back but completely insensitive at 90 degree off-axis. Figure-of-eight mics are often used for specialist applications. They become very helpful where sound spill from a specific direction needs to be avoided. Essentially you just need to aim the ‘deaf’ 90 degree axis towards the sound you don’t want to pick up. Most ribbon mics have a figure-of-eight polar pattern.
Proximity Effect
All conventional directional mics exhibit the so-called proximity effect. This results in a significant bass boost when the microphone is used with the sound source closer than 150mm or so. Only omni pattern mics and specialised cardioid mics incorporating sophisticated design innovations are free from the proximity effect.
Presence Peak
The frequency response of a perfectly accurate microphone would be flat across the human hearing range. Some of the more sophisticated measurement mics get very close to this ideal. However for music recording and vocals in particular, microphones are often designed to emphasise those parts of the audio spectrum that help make vocals sound brighter or more airy. The term ‘Presence Peak’ is often used to describe the region where frequencies are boosted. There is no right or wrong voicing for a vocal microphone — the most important thing is to choose a microphone that suits the voice being recorded on an artistic level. When recording a band at home, consider the acoustic environment of the studio as a part of your microphone choice.
Conclusion
Recording an entire band at your home studio can seem like a daunting task. However, with a bit of guidance and some strategic pieces of equipment you’ll quickly find it’s a very achievable goal. If you’ve followed the advice in this guide, you’ll be well on your way to recording your next demo track in your own home studio!!
Related Articles
WHICH HEADPHONES ARE RIGHT FOR ME?
V-DRUMS MASTERCLASS: RECORDING YOUR TD-30
RECORDING AND MIXING VOCALS: THE BASICS
Related Product


