In past articles, we’ve looked at creating music with your computer setup. This week, we’re going to look at taking those recordings and polishing them within your DAW. Mixing audio can be tricky at times, but if you work to understand the basic concepts behind mixing tools and trust your ears, you can get some great results.
Mixing essentially falls into three main stages:
- Initial Mix Stage – Where you set your initial fader levels and pan settings.
- Effects Stage – Using effects such as EQ, compression, reverb and delay to help your tracks blend well with each other.
- Final Mix Stage – Resetting and Automating Levels.
Let’s have a look at each of these stages in greater detail.
Contributed by David Jiang for the Roland Australia Blog
Initial Mix Stage
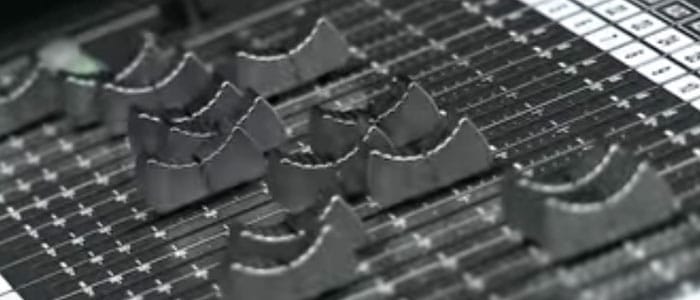
Setting up your initial mix is much like painting a forest landscape. Each track is a tree that needs placement in its own particular space. Unless you thought about it during tracking, most recordings you start mixing begin with all faders set to 0dB and with their pan knobs set dead centre.
This means that all of your trees are right in the middle of your painting and you can’t see the difference between one and the other. Using your volume fader allows you to bring your trees closer or further away, whereas using the pan knobs allows you to move the trees to the left or right of your canvas. Also, keep in mind that each instrument covers a certain spectrum of the frequency range.
An instrument like the piano that can go all the way from deep bass to high treble will take up a lot more room than a human voice. Therefore, if you want to bring your vocal track to the attention of the listener, it will need to be front and centre at a volume level that is equal to or greater than the piano.
However, this is not a hard and fast rule as you can use effects to your advantage to carve out places for your tracks and make them shine while still blending well with each other.
Quick Tip – During this stage, the Auxiliary tracks on your DAW are great for sending groups of multiple similar instruments to. Creating an auxiliary group for your drums, guitars, vocals etc. allows you to make overall changes to a specific section of your track without having to touch the individual faders.
Effects Stage
Let’s take a look at the most commonly used effects and how they can help you in your mix.
EQUALIZER
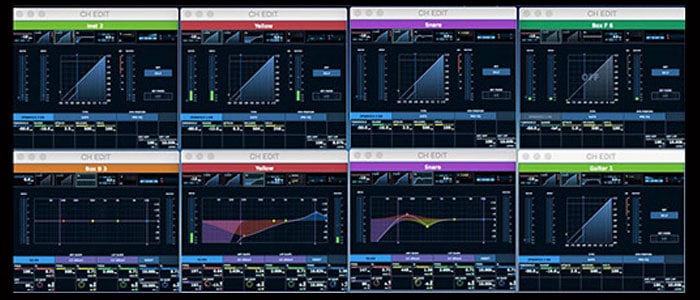
Quite often, the first tool you’ll reach for in your effects kit is an Equalizer or EQ. An EQ allows you to cut or boost frequencies along the audio spectrum, effectively allowing you to sculpt your sound to fit into your mix. The main controls on an EQ are Frequency, Boost/Cut and Q Factor.
The Frequency control allows you to select the exact point along the spectrum that you want to begin boosting or cutting. The Boost/Cut control allows you to boost or cut the frequency by a number of decibels. The Q Factor control allows you to change the bandwidth or number of frequencies that will be boost or cut by the equalizer. A higher Q factor will narrow the bandwidth, whereas a lower Q factor will widen it, allowing you to hone in on specific frequencies or affect more across the spectrum.
Some EQ devices feature Constant Q, where the bandwidth remains consistent as frequencies are boosted or cut. Alternatively, some EQ devices have Variable Q, where the bandwidth narrows as frequencies are cut or boosted. These various methods of Q interaction each have their own sound and use in both sound shaping during mixing or subtle EQ balancing often used in the mastering process.
There are three main types of EQ.
- Graphic EQ: A Graphic EQ has fader controls that are used to boost or cut fixed frequency bands. Therefore, a graphic EQ has no Q factor control. Most Graphic EQs have between 7 and 31 bands and it is up to the designer to decide what the bandwidths of those bands are. Graphic EQs are generally favoured in Live PA setups because they are an easy set and forget option for tuning PA systems to rooms. However, they do have their uses in the studio.
- Shelving EQ: Shelf EQs are filters that attenuate or boost frequencies above or below a specified frequency.
- Parametric EQ: A Parametric EQ is the most versatile type of EQ because it gives you continuous control over its parameters. Using knobs rather than the sliders of a graphic EQ allows a user to sweep across the frequency range and most parametric EQs have Q factor control as well.
In your DAW, the most likely entry point to EQ is a parametric EQ with options for adding shelving EQs. The advantage of DAW based parametric EQs is that they usually show you the frequency spectrum as a graph and allow you to select points along that spectrum to boost and cut. As you boost or cut the frequency bands, the graph gives you a visual representation of your changes.
You can use EQ to attenuate problem frequencies such as low-end rumble, mid-range honk or high-end hiss. To do so, your best bet is to boost a notch EQ band at a narrow Q Factor and sweep that band along the spectrum until you hear the frequency you are trying to isolate. You can then cut that band down to an appropriate level and widen the Q factor if you would like to smooth out the cut (trust your ears). Keep in mind that the harmonics of the problem frequency are most likely also resonating, so check frequencies that are double the problem frequency and then double of that frequency until you are satisfied with the result.
![]()
COMPRESSION
Compression allows you to “fatten” up your sounds by increasing the overall volume of your track and then attenuating the highest peak levels of the signal. A bit of light compression can give your sound the boost it needs without affecting dynamic range too much, or you can go with a heavily compressed effect that will squash your signal’s dynamic range but keep all of your sound at a consistent level.
The main controls on most compressors are attack, release, threshold, ratio and makeup gain. The Threshold controls the decibel level at which your compressor starts working on a sound. The ratio controls how hard the compressor clamps down on your signal once it exceeds the threshold. The attack determines how fast the compressor grabs the signal once this threshold is exceeded and the release determines how long the compressor takes to stop compressing once signal has dropped below the threshold.
For example, a ratio of 2:1 means that a signal that exceeds the threshold by 2dB will be attenuated to 1dB above the threshold. The makeup gain control allows you to boost your signal back to its former level, once it has been attenuated.
Some compressors have a key or sidechain input which allows your compressor to act on a separate signal. This is often used creatively on synth lines with a side chain connected to the Kick drum track. This means that every time the kick drum hits, your Synth will be squashed down, leaving room for your kicks to really hit through. Alternatively, you could mute a rhythm track and use it as a side chain to create a choppy effect.
Things to know:
- Compression factors don’t add – they multiply! For example, a voice compressed at 3:1 during recording then again while mixing at 10:1 actually has the same effect as being compressed at 30:1. When it then gets mastered and then broadcasted, it gets compressed again and again, so it’s vital to always be aware of how the final result will sound to the listener.
- A good way to learn what compressor controls do is to increase the ratio and lower the threshold. Then use the attack and release controls one after the other to hear their effect on the signal.
- A compressor with a ratio of 20:1 or above is called a limiter. Limiters clamp down hard on signals that exceed the threshold. Limiters are used when recording to reduce the chance of clipping. In a mix, they can be used in conjunction with compressors to limit the initial peaks before the compressor is used for signal shaping. They are also used in mastering and in broadcast to set the maximum output level no matter what.
![]()
REVERB
Reverb allows you to create the illusion of space in your tracks. Reverb is the way to go if you do not have the luxury of a great sounding recording room or if you just want to change the ambience of a particular track. There are many types of reverb that emulate rooms, halls or even special effect reverbs such as springs or plates that each have their own distinctive sound.
Some reverbs have a wet/dry control that allows you to balance the amount of reverb compared to the original signal, but if your reverb of choice does not have this then you can always route your audio to an auxiliary track with the reverb plugged in. Sliding the fader up will increase the amount of wet reverb signal whereas pulling the fader down will decrease it. You can even route multiple tracks of reverb to this auxiliary track so that your instruments all appear to be in the same space.
![]()
MODULATION EFFECTS
Modulation effects like flangers and phasers are great for adding an extra level of excitement and sparkle. They help a track stand out in a mix or give it a sense of movement. Some great examples are the cymbals on Led Zeppelin’s “Kashmir” which have a light phaser effect applied to them, helping to create a washy, dreamlike texture to an instrument which is usually harsh and sharp.
Flangers are great on electric guitar tracks to provide interest, such as the rhythm guitar part in Lenny Kravitz’s “Are You Gonna Go My Way?” before the solo comes blasting through.
As with all effects, keep in mind that less is more and trust your ears to decide what sounds right for your track.
Final Mix Stage
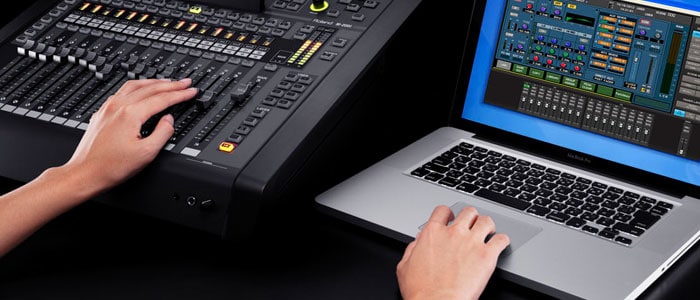
Once you’re done with the effects stage, you should revisit your fader levels and readjust, as it is most likely that your effects have changed the balance of your mix. After this, you should look to whether your mix has any parts that could benefit from automation. Automation is a feature included in most DAW software that allows your project to remember fader movements, pan changes or changes to effects settings.
The most common automation you will likely use is volume fader automation. To do this, you can go into the automation view mode of your DAW and use the inbuilt editor to draw in fader movements where needed (such as a note that needs to be boosted slightly or a backing vocal that drops in volume during a specific section).
Alternatively, if you want a more hands-on approach, you can set the automation mode on your track to “Touch” mode. This mode allows you to grab the fader with your mouse or external controller and move it in real time while the track is playing. The DAW will remember any changes you make and play them back when you change the mode back to “Read”.
Once you have completed your final mix stage and are feeling happy with how your track has come together, you are ready to send it on to a mastering engineer. Alternatively, if you want to give mastering your own tracks a stab, check out this article from our friends at Roland UK : https://www.rolandcorp.com.au/blog/how-to-use-mastering-for-a-big-sounding-mix
Related Articles
COMPUTER MUSIC PRODUCTION FOR BEGINNERS PART 1: THE ESSENTIALS
COMPUTER MUSIC PRODUCTION FOR BEGINNERS PART 2: RECORDING AND COMPOSITION
HOW TO USE MASTERING FOR A BIG SOUNDING MIX
THE A-Z OF RECORDING
10 WAYS GUARANTEED TO QUICKLY IMPROVE YOUR MUSIC PRODUCTION

