The shimmering, spatial chords from the guitar of Andy Summers, ringing out over the top of Sting’s bass line, with the side-stick reggae feel of Stewart Copeland’s drums tapping beneath. This is how the now legendary song Walking on the Moon by The Police hit the airwaves in 1979. It was the second single from their second album, Reggatta de Blanc.
Andy Summers is famous for his use of intricate and interesting chord inversions. This, along with various modulation effects and delays, created complex landscapes of tone. Although we have no absolute confirmation of what equipment Andy used for this session, (not even from him!), we do know that during this time, Andy was using Marshall stacks, his ’61 Fender Telecaster, several modulation effects, including the chorus from the famous Roland JC-120 amplifier, and some tape and analog delays.
Recreating this tone
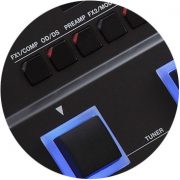
To recreate this tone, I’m going to use the BOSS GT-1, entry-level, multi-effects unit. While it’s great if you have access to all of the original gear used by Andy, that still doesn’t help you to simulate all of the other elements of the recording process, which I’ll explain in a moment.
The parts of this tone are very straight forward, but as always, the devil is in the detail. For this tone, we’re looking for a sharp attack with a lot of treble response, a modulation effect to give the tone movement after we strike the chord, some compression for sustain, and a timed delay with some reverb for space.
Firstly, let’s break down the components of tone in a process I call, the 4 Elements of Tone.
Visit guitarfxpatches.com and download free guitar tone from Walking On The Moon using Discount Code: GT1WALKING
Contributed by Josh Munday – Tone Designer for the Roland Australia Blog
1. The Guitar
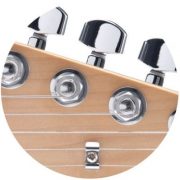
 Most likely, this was Andy’s ’61 Fender Telecaster. I used a Mexican Fender Strat in the video for this tone design segment, which has 3 single coil pickups, so we can get close. I like to use very “plain” and familiar sounding guitars for tone design, because it’s easier for others to replicate and shows that this is possible, even with basic/affordable gear, (i.e. Mexican Strat + GT-1).
2. The Pickup Selection
 The pickup selection is definitely a bridge pickup tone. The sharp attack to those chords gives that away.
3. The Amp
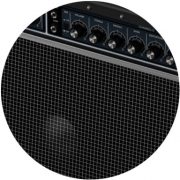
 Andy was using Marshall stacks in those days, and most probably a Marshall JMP 1959 Super Lead. They have a nice immediate attack to them, so that, combined with the pickup tone, gives us all the cut we need.
When selecting an amp, there are some basic rules of thumb that will help:
ALWAYS START WITH EVERYTHING OFF!!!
I can’t stress this enough. Find the OFF button for everything in the signal chain, so all you can hear is your dry old guitar sound coming through. Remember, any multi-FX/amp simulator like the BOSS GT-1 is just simulating a room full of gear, so think about it like that. You wouldn’t walk into a room full of amps and FX and start by turning everything ON would you? You would plug into an amp, get a good basic tone, then turn on any effects, one at a time and build up your sound…likewise with any multi-FX.
- Set the EQ “flat” (i.e. all settings at the halfway point, or 12 o’clock). This gives you a neutral starting point so that the EQ isn’t colouring the tone too much yet.
- Put the gain up to about a quarter to half a turn, so you can hear the gain character.
We’re looking for a tone that resembles a Marshall JMP 1959 Super Lead, so in the PREAMP section of the GT-1 signal chain, I’ve selected the MS1959 I setting. This will give us the nice sharp tone and very slight breakup of a Marshall. Now, onto the other amp settings.
The settings I’ve chosen for this amp are written below. But, the process of getting there is of course, trial and error (isn’t ALL guitar tone!?). I’ve driven the GAIN of the amp, (as they did in the studio), but that didn’t get the same result, (since it’s not the same gain stage as the original desk). The fuzz and compression we are going to add next will start to give us the right characteristics, and will also react to the amp simulator settings.
The settings I’ve chosen are:
- GAIN – 9
- LEVEL – 75
- BASS – 42
- MIDDLE – 44. Just boosting the MIDDLE on the amp setting still wasn’t quite right for this tone, so I also used the EQ in the MASTER SETTING section of the signal chain to boost the MID GAIN setting. I used a setting of +10dB, and you can select the frequency of the midrange in this part, so I turned this to 800Hz to try and simulate the specific midrange frequency from the recording.
- TREBLE – 65
- PRESENCE – 22
- SP TYPE – 4×10″. I’ve changed the Speaker Type from the ‘ORIGINAL’ setting, which gives you the standard speaker cab simulator for that particular amp. In this case, it’s usually a 4×12″ speaker cab by default. Changing the speaker type changes the frequency focus. Sometimes, you just can’t get the tone from an EQ change alone. The amplifier drive response can be correct, but the speaker needs to change. So for this tone, the 4×10″ had the right tonality.
As well as the EQ setting for the amp, I’ve also used the EQ in the MASTER SETTINGS part of the signal chain to tweak the tone some more. Boosting or cutting the EQ on the Amplifier Simulator has a different effect on the tone than the MASTER SETTING part. Think of the AMP EQ as changing the EQ on the Virtual Amplifier and the MASTER SETTINGS EQ as changing the EQ on the mixing board, after it has been recorded.
The setting I’ve selected in the MASTER SETTINGS section are:
- PATCH LEVEL – 132
- LOW GAIN – 2
- MID GAIN – 2
- MID FREQ – You can also select the frequency of the midrange in this part, so I turned this to 800Hz to try and simulate the specific midrange frequency of the recording.
- THE MID ‘Q’ – 1. The “Q” determines how much the frequencies surrounding the midrange frequency you’ve set will be affected. The lower the number, the more frequencies surrounding the MID FREQ setting will be affected when you boost or cut in the MID GAIN setting.
- HIGH GAIN – 0
Now to the other effects.
4. The Effects
 Before we get started on the effects section, I just want to explain what I mean by “effects”. This can mean not only traditional effects that you would run in the main input or in the effects loop of your amplifier, (such as overdrive pedals, chorus, etc), but also any effects that were added later in the mixing process, or “Post-Production” effects.
Delays for instance, are often added after the track has been recorded and would not have been heard by the guitarist at the time of recording. Other elements that I would count in the effects section are:
- EQ and compression that were adjusted in the mixing stage.
- The microphone that is on the speaker cabinet. What did it sound like?
- Was there a second microphone in the room, away from the speaker cabinet?
- How far away from the speaker cabinet was the mic?
- How loud is that second mic in the mix?
- What did the room sound like from that room mic?
- etc…etc…etc….and on and on it goes.
Now, this is starting to sound super-complicated right? Well, let’s just go through each part step-by-step and I’ll take you through how we can simulate some of these elements.
For this recording, I can’t really hear any audio characteristics that resemble a room mic, so we don’t need to worry about that. But for more details on the process of simulating a room mic, please see my other article, Jimi Hendrix’s “Voodoo Child (Slight Return)” Deconstructed.
Modulation
After the initial chord strike, you can hear the chord modulate (meaning a detuning type of effect where the pitch “wabbles”). This chord fades away quite quickly at the moment, but we’ll fix that with the sustain of the compressor in the next section. I’ve experimented with both a chorus and a flanger for the modulation effect with this tone, (because Andy Summers used both). So far, I think the flanger is the closest. Select a flanger in the FX2/MOD section of the signal chain and use the settings below.
- RATE – 30
- DEPTH – 50
- RESONANCE – 0
- MANUAL – 25
- LOW CUT – FLAT
- LEVEL – 100
Delay
The rhythmic delay is another major part of this tone. When programming delays, it’s important for the timing to be as close as possible to what you can hear in the song. I’ve also used a modulated delay, to get an even more extreme detuning effect. I’ve used the DLY section to add this delay.
The settings I’ve used are:
- TYPE – MODULATE
- TIME – 345ms
- FEEDBACK – 35
- E.LEVEL – 94
- MOD RATE – 40
- MOD DEPTH – 50
- HIGH CUT – FLAT
Compression
With a clean tone such as this you get more dynamics, but the chord fades away very quickly. We can add more sustain to the tone with the compressor. This keep the volume more consistent as the chord dies away.
We’re going to add the compressor in the FX1/COMP section of the signal chain.
Here are the settings I’ve used:
- TYPE (of effect) – COMPRESSOR
- TYPE – BOSS
- SUSTAIN – 74
- LEVEL – 50
- ATTACK – +80
- TONE – 0
Reverb
The last element of this tone is the sense of overall space. This can be added with reverb. I’ve used a nice large PLATE type of reverb for this effect, with plenty of travel time (the amount of time the reverb takes to fade away).
To simulate the specific reverb, I’ve used the following settings in the REVERB section of the signal chain:
- TYPE – PLATE (this is a lush, spacious sounding reverb that’s perfect for this tone)
- TIME – 2.5s
- E.LEVEL – 57
- Over the page, you will see 2 more settings – LOW CUT and HIGH CUT. These 2 settings dictate how large a frequency band that you will hear the reverb in. Often on guitar recordings, you don’t need a full range reverb, so I’ve cut everything from 160Hz down and 4kHz up.
Settings are:
-
-
- LOW CUT – 160Hz
- HIGH CUT – 4.00kHz
-
Control Pedal Assign
There are no controls needed for this tone, so you can set the control pedal to OFF. Or, use a solo boost if you want to raise the level between the intro lick and the rhythm part.
And that’s it!
There you have it guys, the guitar tone from Walking on the Moon. If you have a BOSS GT-1 and don’t want to have to program this tone yourself, you can download it from my website.
Just enter this Discount Code and you can get it for FREE!
Website = guitarfxpatches.com
Discount Code = GT1WALKING
Related Articles
JIMI HENDRIX ‘VOODOO CHILD (SLIGHT RETURN)’ TONE DISSECTED
THE BEATLES ‘REVOLUTION’ TONE DISSECTED
STEVIE RAY VAUGHAN ‘PRIDE AND JOY’ TONE DISSECTED
VAN HALEN ‘ERUPTION’ TONE DISSECTED
FOUR ELEMENTS OF GUITAR TONE
TONES IN TIME – 60S ROCK


